Кресло graco nautilus инструкция
Наша цель - обеспечить Вам самый быстрый доступ к руководству по эксплуатации устройства Graco NAUTILUS Child Restraint/Booster Seat . Пользуясь просмотром онлайн Вы можете быстро просмотреть содержание и перейти на страницу, на которой найдете решение своей проблемы с Graco NAUTILUS Child Restraint/Booster Seat .
Для Вашего удобства
Если просмотр руководства Graco NAUTILUS Child Restraint/Booster Seat непосредственно на этой странице для Вас неудобен, Вы можете воспользоваться двумя возможными решениями:
- Полноэкранный просмотр -, Чтобы удобно просматривать инструкцию (без скачивания на компьютер) Вы можете использовать режим полноэкранного просмотра. Чтобы запустить просмотр инструкции Graco NAUTILUS Child Restraint/Booster Seat на полном экране, используйте кнопку Полный экран .
- Скачивание на компьютер - Вы можете также скачать инструкцию Graco NAUTILUS Child Restraint/Booster Seat на свой компьютер и сохранить ее в своем архиве. Если ты все же не хотите занимать место на своем устройстве, Вы всегда можете скачать ее из ManualsBase.
Печатная версия
Многие предпочитают читать документы не на экране, а в печатной версии. Опция распечатки инструкции также предусмотрена и Вы можете воспользоваться ею нажав на ссылку, находящуюся выше - Печатать инструкцию . Вам не обязательно печатать всю инструкцию Graco NAUTILUS Child Restraint/Booster Seat а только некоторые страницы. Берегите бумагу.
Резюме
Ниже Вы найдете заявки которые находятся на очередных страницах инструкции для Graco NAUTILUS Child Restraint/Booster Seat . Если Вы хотите быстро просмотреть содержимое страниц, которые находятся на очередных страницах инструкции, Вы воспользоваться ими.
Краткое содержание страницы № 1
Child Restraint/Booster Seat
Owner’s Manual
READ THIS MANUAL
Do not install or use this child restraint until you read and understand the instructions in this manual.
FAILURE TO PROPERLY USE THIS CHILD RESTRAINT INCREASES THE RISK OF SERIOUS
INJURY OR DEATH IN A SUDDEN STOP OR CRASH.
© 2007 Graco ISPC110BB 12/07 US�������������������������������������������������������������������������������������������������������������������������������������������������������������������������������
Краткое содержание страницы № 2
Table of Contents 1.0 Warnings to Parents and Other Users 7.3 SAFE Vehicle Seat Belt Systems . 19 . 4 7.4 For Built-in Harness Only . 20 2.0 Registration Information. 5 2.1 Register Your Child Restraint 5 7.5 WITH or WITHOUT Built-in 2.2 Recall Information. 5 Harness . 21 2.3 If You Need Help . 5 7.6 To Install Locking Clip. 22 3.0 Features. 6-7 7.7 UNSAFE Vehicle Bel
Краткое содержание страницы № 3
Краткое содержание страницы № 4
1.0 Warnings to Parents and Other Users Failure to properly use this child restraint increases the risk of serious injury or death in a sharp turn, sudden stop or crash. Your child’s safety depends on you installing and using this child restraint correctly. Even if using this child restraint seems easy to figure out on your own, it is very important to READ THE OWNER’S MANUAL and the vehicle owner’s manual. Your child’s safety depends on: 1. Choosing the correct mode of use for the child rest
Краткое содержание страницы № 5
Краткое содержание страницы № 6
3.0 Features Harness slots Height adjust button Shoulder belt guide Body support Head support Harness buckle Crotch strap Harness covers Harness clip Storage compartment (one on each side) Vehicle belt Recline guide foot Harness Cupholder Adjustment adjuster strap lever (above strap) Recline handle 6����������������������������������������������������������������������������������������������������������������������������������������������������������������������������������������������
Краткое содержание страницы № 7
The locking clip is stored on the back of the child restraint. You will need to use it with certain types of vehicle seat Harness slots belts. (behind straps) Strap United States Federal guides Tether Motor Vehicle Safety (behind straps) storage bar Standards have defined a new system for LATCH installing child restraints storage bars (on each side in vehicles. The system of seat) Red Rollers is called LATCH (Lower Release (behind straps) Anchorage and Tether buttons for CHild
Краткое содержание страницы № 8
4.0 Assembling the Child Restraint Adult assembly required. KEEP GUTTERS CLEAR 1. Lay child restraint flat on back with armrests out to either side of base. Grab seat pad fabric in sitting area to expose the gutters . MAKE SURE all hands, fingers and other objects are clear of the gutters. 2. MAKE sure the harness straps are securely attached within the “T”-shaped slots around the arms as shown Ë. KEEP GUTTERS CLEAR With your other hand, raise seat back so that both arms LOCK i
Краткое содержание страницы № 9
Краткое содержание страницы № 10
5. Attach 4 elastic loops from the seat pad under the seat exactly as shown in Ï . Ï 6. Pull elastic loop on the seat pad through the vehicle belt guide on side of seat and attach to hook as shown Ð. Repeat on other side. Ð 10 DO NOT use this car seat after December NE PAS utiliser ce siège d'auto après décembre NO use este asiento para autos después de Diciembre 2013����������������������������������������������������������������������������������������������������������������������������
Краткое содержание страницы № 11
7. Squeeze height adjust button Ñ and push head support into slots Ò on the back support as shown. Head support will click into the back Ñ support. You may need to unfasten the hook and loop attachment tape on both sides at the top of the back support to allow for easier access to the slots. Always use child restraint with head support installed and properly adjusted. Ò CLICK! . 11�����������������������������������������������������������������������������������������������������������
Краткое содержание страницы № 12
Краткое содержание страницы № 13
5.0 Important Information • NO CHILD RESTRAINT CAN GUARANTEE • DO NOT use locking clip in booster mode. PROTECTION FROM INJURY. However, • NEVER PLACE THIS proper use of this child restraint reduces the CHILD RESTRAINT IN A risk of serious injury or death to your child. VEHICLE SEATING • DO NOT INSTALL OR USE THIS CHILD LOCATION THAT HAS A RESTRAINT UNTIL YOU READ AND FRONT AIR BAG. If an air bag UNDERSTAND THE INSTRUCTIONS IN THIS inflates, it can hit the child and child restraint MAN
Краткое содержание страницы № 14
• NEVER USE CHILD RESTRAINT IF IT HAS • NEVER LEAVE A CHILD RESTRAINT DAMAGED OR MISSING PARTS. Do not use UNSECURED IN YOUR VEHICLE. An a cut, frayed or damaged child restraint unsecured child restraint can be thrown around harness, LATCH belt or vehicle seat belt. and may injure occupants in a sharp turn, • THE CHILD RESTRAINT CAN BECOME sudden stop or crash. Remove it or make sure VERY HOT IF LEFT IN THE SUN. Contact with that it is securely belted in the vehicle. If not these
Краткое содержание страницы № 15
6.0 Height and Weight Limitations FAILURE TO USE CHILD RESTRAINT IN A MANNER APPROPRIATE FOR YOUR CHILD’S SIZE MAY INCREASE THE RISK OF SERIOUS INJURY OR DEATH. Instructions for the use of this child restraint differ greatly depending on the size of your child. Be sure you are using the child restraint in the correct mode and with the correct features for your child. 6.1 WITH Built-In Harness Your child must meet all requirements: • Weight: 20 to 65 lbs (mass between 9 and 29.5 kg) • Heigh
Краткое содержание страницы № 16
6.2 WITHOUT Built-in Harness Your child must meet all requirements: • Weight: 30 to 100 lbs (mass between 13.6 and 45 kg) • Height: 38 to 57 inches (96 and 145 cm) in height • approximately 3-10 years of age • the shoulder belt MUST lie across child’s shoulder as shown and the lap portion of the belt is positionned low on the child’s hips. • Child’s ears are BELOW top of booster seat. If tops of ears are above top of seat, child is too large for booster seat. If child is between 30 and 6
Краткое содержание страницы № 17
6.3 WITHOUT Back Support Your child must meet all requirements: • weigh between 40 and 100 lbs. (mass between 18 and 45 kg), • and are between 40 and 57 inches (101 and 145 cm) in height, • approximately 4-10 years of age • the shoulder belt MUST lie across child’s shoulder as shown and the lap portion of the belt is positionned low on the child’s hips. When sitting on the booster seat, your child’s ears should be below the top of the vehicle seat cushion / head rest. Your Graco
Краткое содержание страницы № 18
7.0 Choosing an Appropriate Vehicle Seat Location 7.1 Vehicle Seat Location Requirements IMPROPER PLACEMENT OF THE CHILD RESTRAINT INCREASES THE RISK OF SERIOUS INJURY OR DEATH. Some seating positions in your vehicle may not be safe for this child restraint. Some vehicles do not have any seating positions that can be used safely with the child restraint. If you are not sure where to place the child restraint in your vehicle, consult your vehicle owner’s manual or call Graco Children’s Produ
Краткое содержание страницы № 19
7.2 Vehicle Seat Belt Requirements MANY SEAT BELT SYSTEMS ARE NOT SAFE TO USE WITH THE CHILD RESTRAINT. THE VEHICLE SEAT BELT MUST BE DESIGNED TO HOLD THE CHILD RESTRAINT TIGHTLY AT ALL TIMES. Pay careful attention to these systems; some of the seat belts that are not safe to use look very much like seat belts that are safe to use. If you are unsure, consult your vehicle owner’s manual or call Graco Children’s Products Inc., 1-800-345-4109. 7.3 SAFE Vehicle Seat Belt Systems THE FO
Краткое содержание страницы № 20
7.4 For Built-in Harness Only • Lap Belts - Manually Adjusted When buckled, the belt is tightened manually by pulling on the excess belt. • Lap Belts with Automatic Locking Retractor (ALR) The automatic locking retractor will not permit the lap belt to lengthen once it is buckled. Tighten the belt by feeding the belt back into the retractor while pushing down hard on the child restraint. 20��������������������������������������������������������������������������������������������������
Graco Nautilus Elite
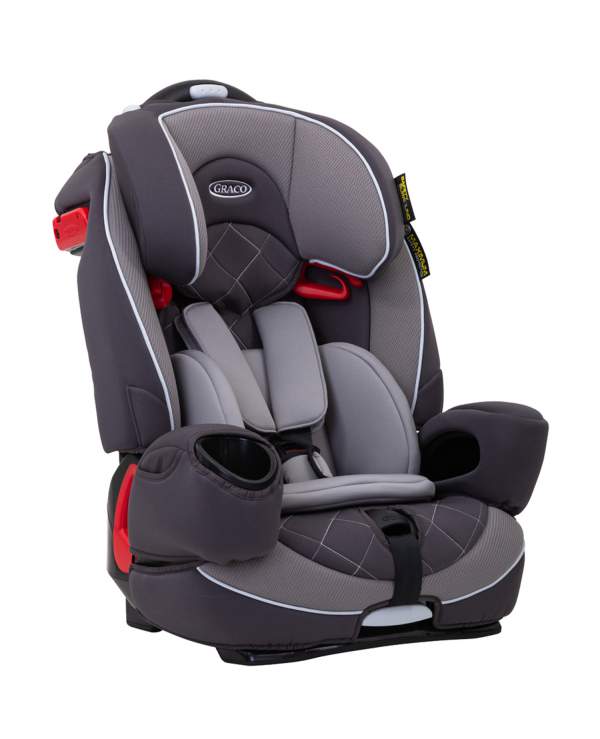
Graco Nautilus Elite — автокресло-трансформер для детей весом от 9 до 36 кг (примерно от 9 месяцев до 12 лет). Модель «растёт» вместе с ребёнком. 5-точечные ремни безопасности имеют 5 ступеней регулировки.
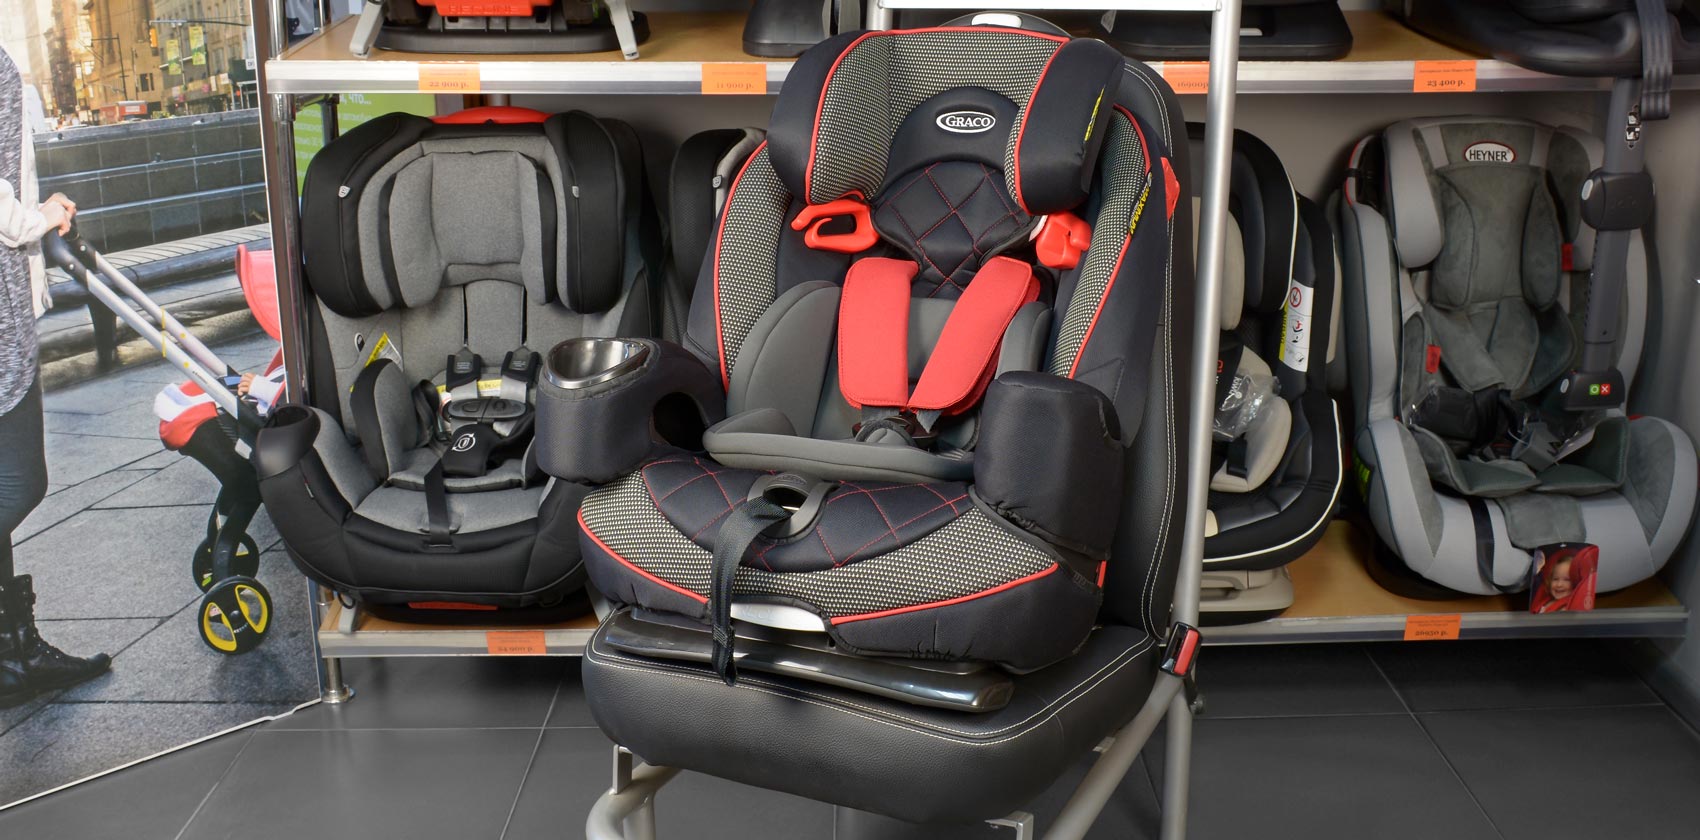
Graco Nautilus Elite (Грако Наутилус Элит) — автокресло для детей от года до 12 лет.
Содержание
Характеристики
Группа: 1-2-3 (от 9 до 36 кг)
Рост: от 70 до 150 см
Габариты В × Ш × Г:
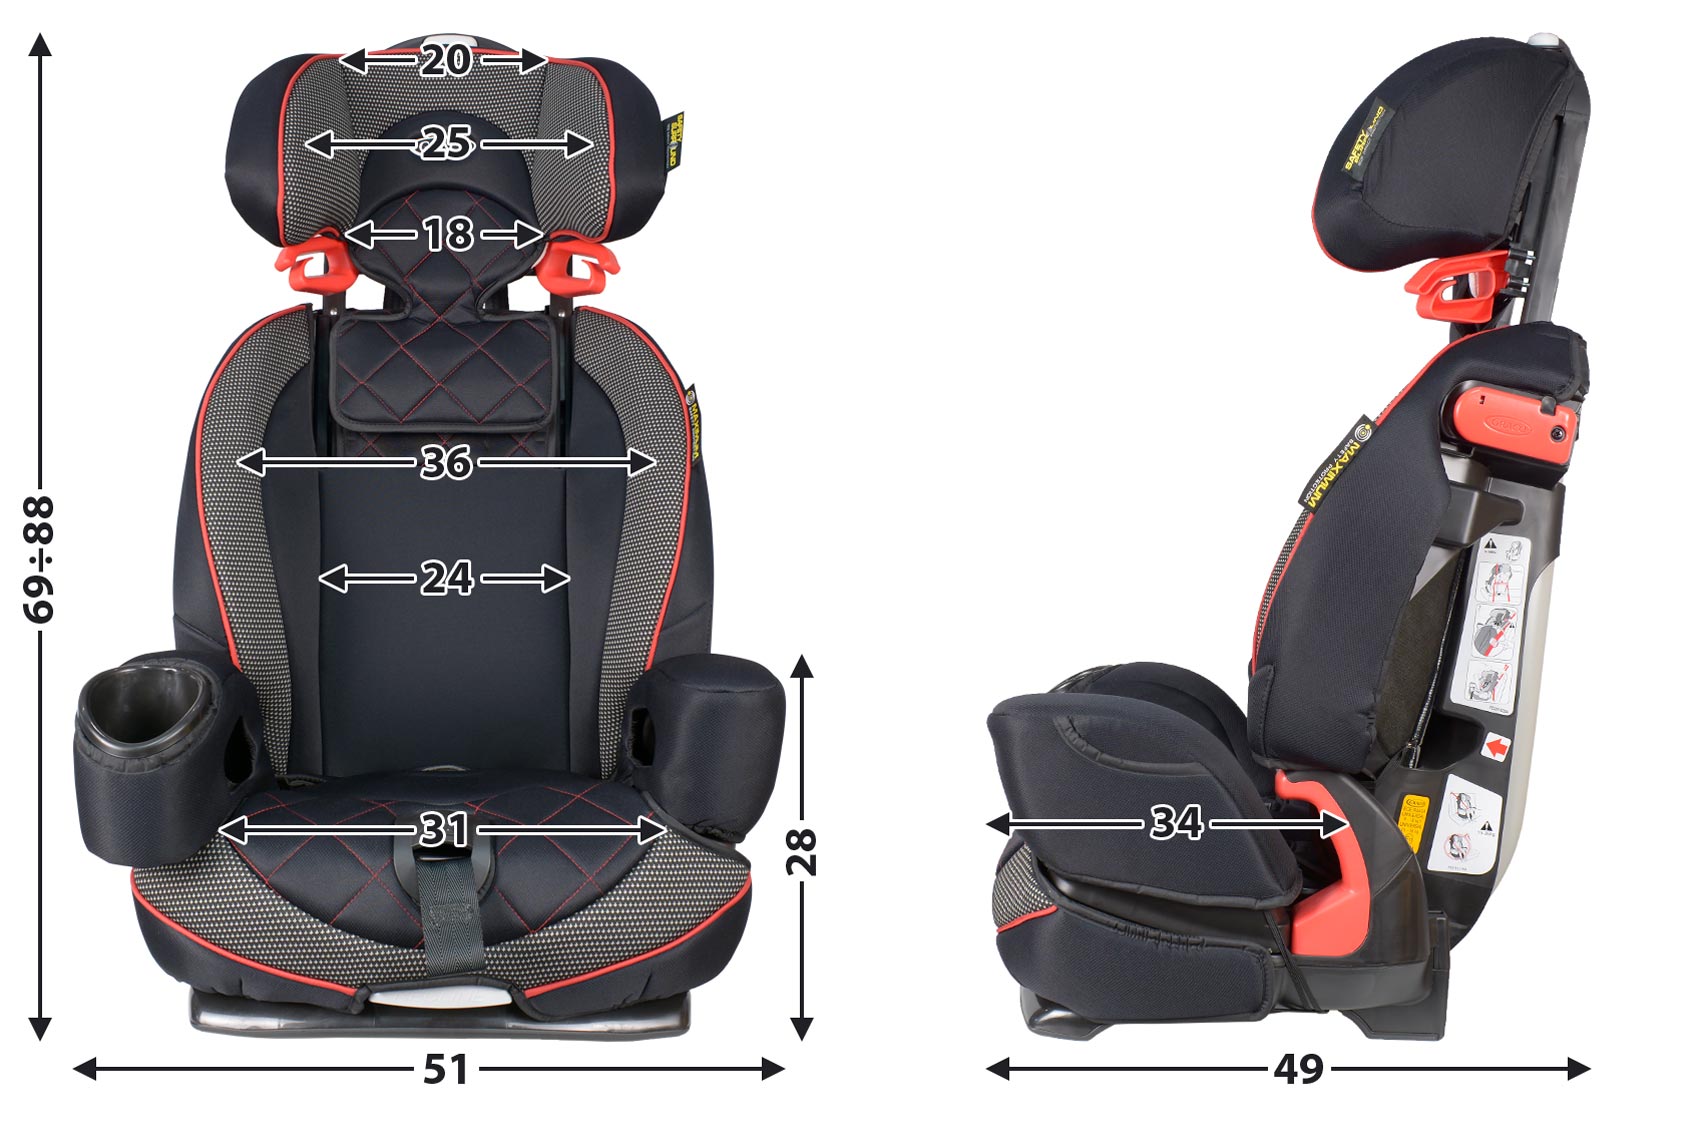
В этом обзоре участвует автокресло Graco Nautilus Elite в расцветке Saturn. Универсальное кресло Nautilus Elite имеет ряд преимуществ: вместительную чашу, широкий регулируемый подголовник, дышащие материалы, простой способ установки автомбильным ремнём.
Graco Nautilus Elite обзор 360 градусов
Обзор 360 градусов
Безопасность
Nautilus Elite имеет усиленную металлическую конструкцию с боковой защитой, которая максимально защищает ребёнка в экстренной ситуации.
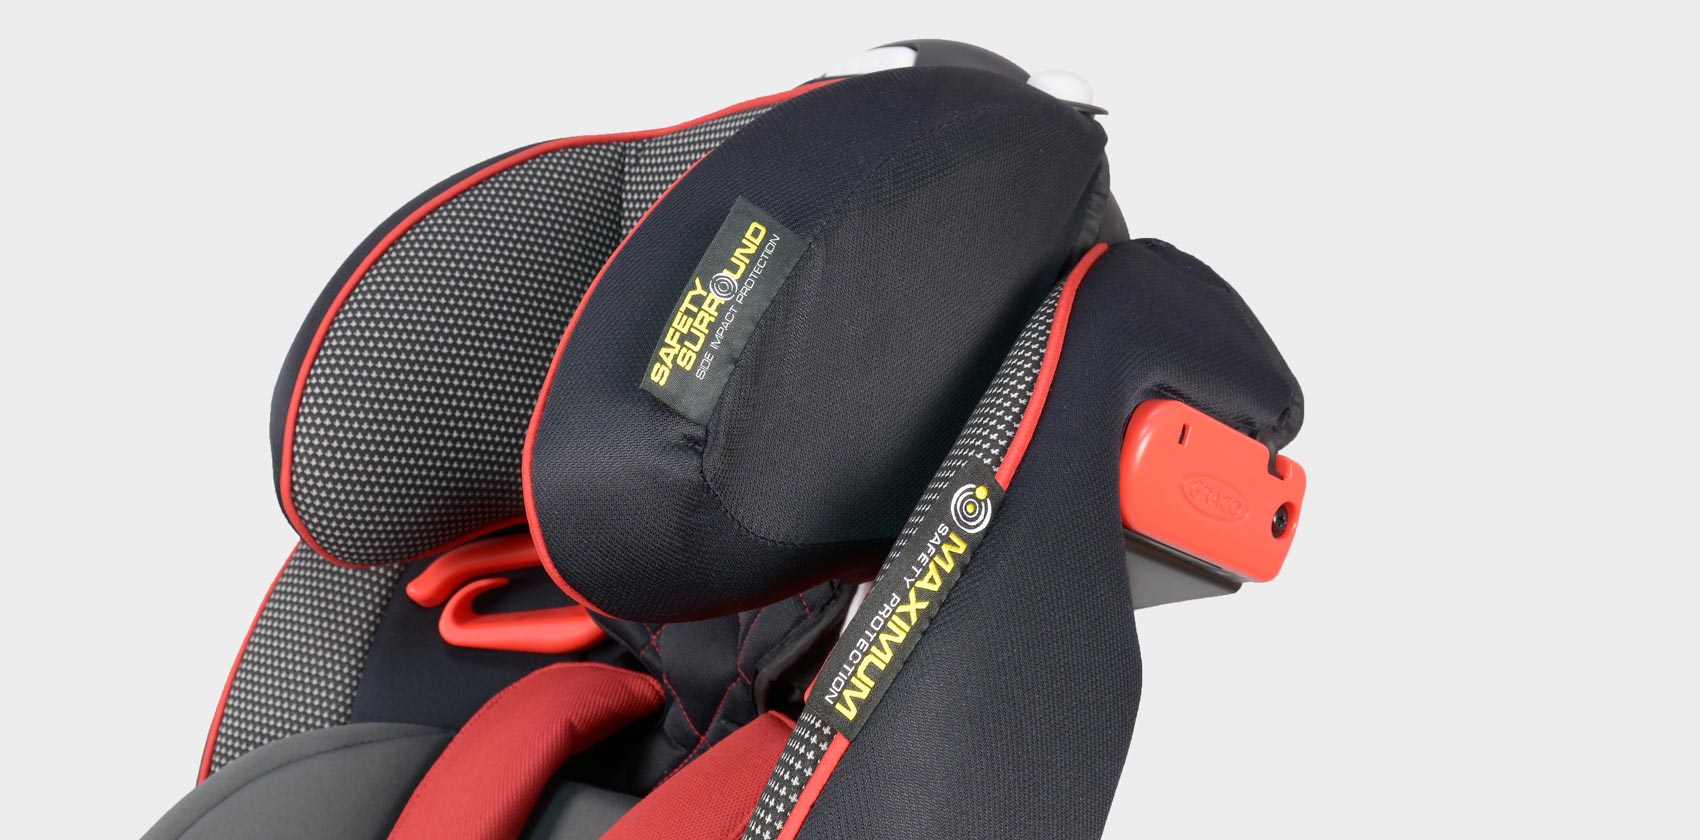
Safety Sorround Side Impact Protection — защита головы и плечевой области
Регулировки
В автокресле присутствует ряд удобных регулировок, позволяющих адаптировать кресло под возраст и рост ребёнка.
Graco Nautilus Elite регулировка подголовника по ширине
Регулировка подголовника по ширине
В верхней части располагаются две кнопки для регулировки ширины.
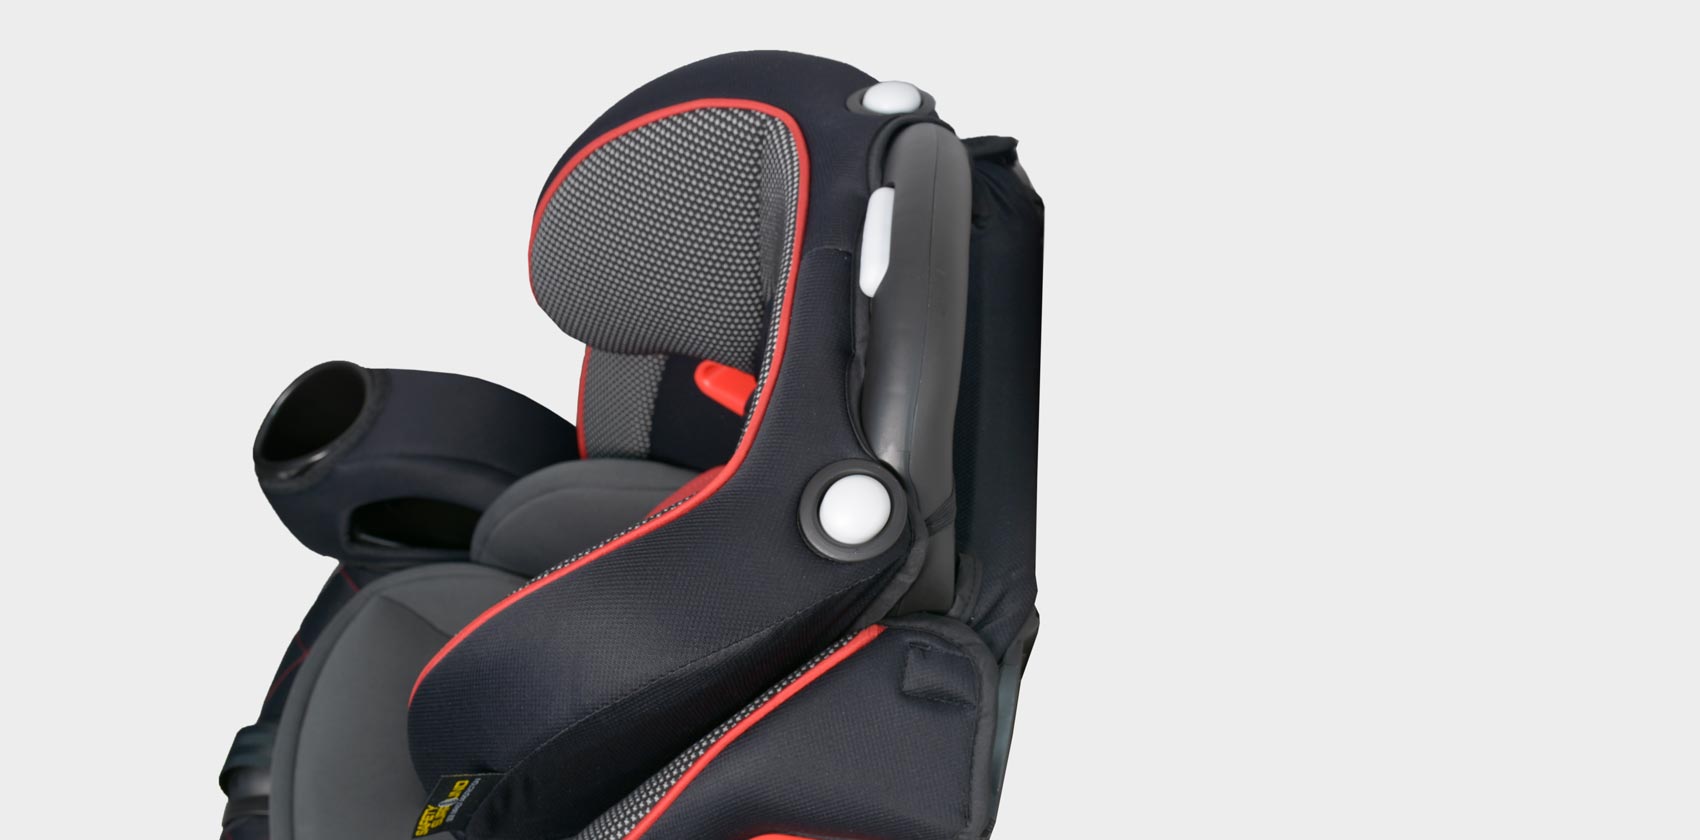
Чтобы обеспечить надлежащую посадку ребёнка в кресле, подголовник регулируется по высоте. Для поднятия подголовника используется клавиша серого цвета, которая располагается в верхней части.
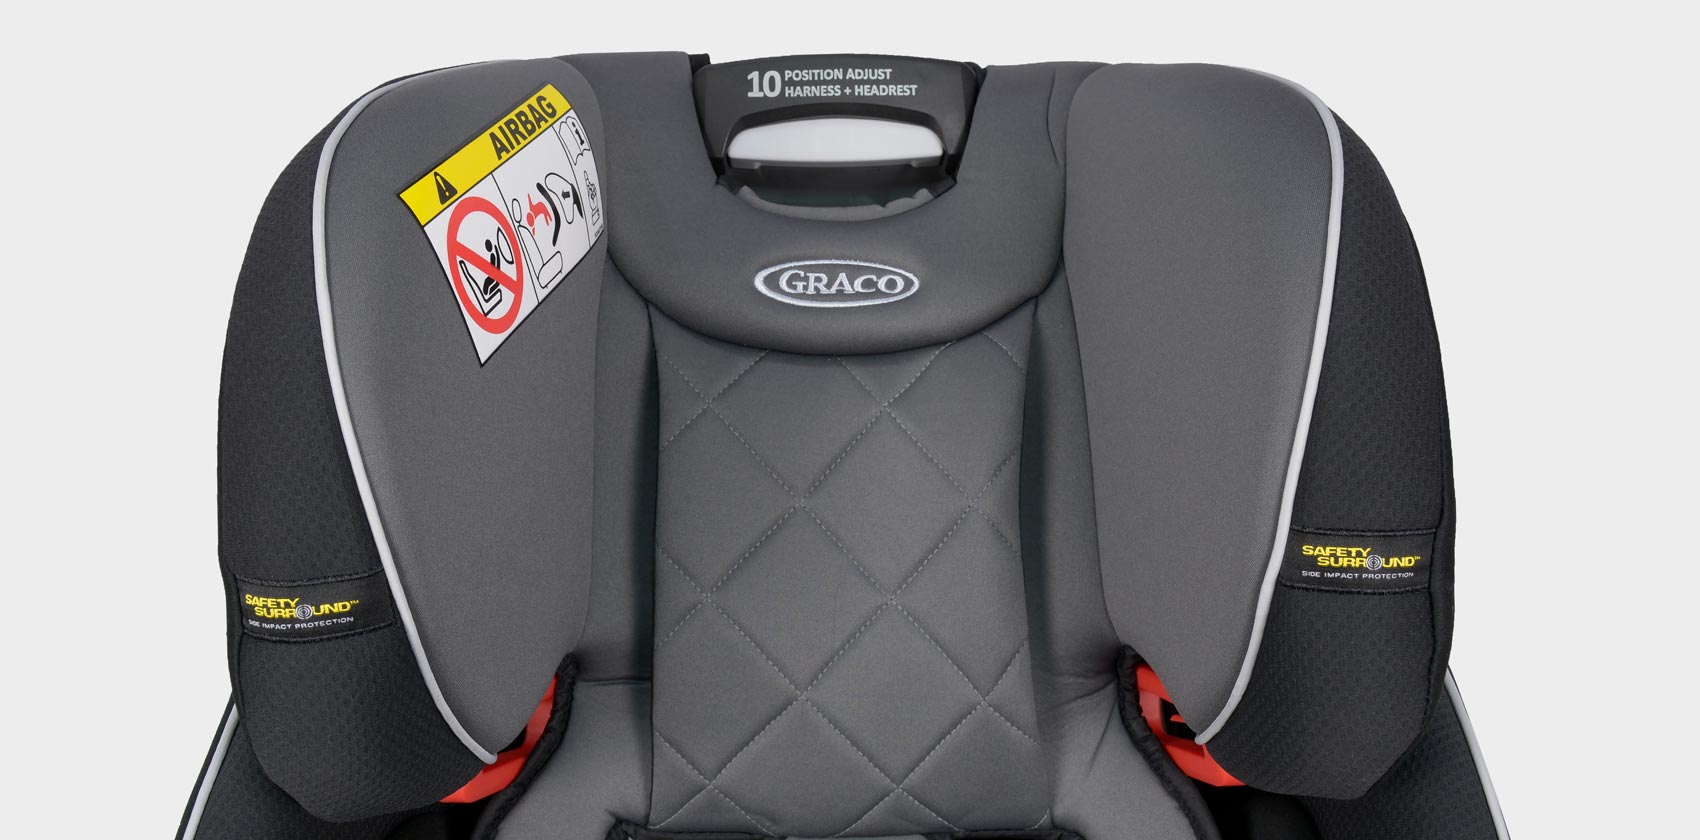
Регулировка высоты подголовника осуществляется одновременно с внутренними 5-точечными ремнями (группа 1). Подголовник и ремни имеют достаточное количество позиций для того, чтобы оптимально подстроить их под рост ребёнка.
Graco Nautilus Elite регулировка подголовника группа 1
Регулировка подголовника группа 1
Graco Nautilus Elite регулировка подголовника группа 2-3
Регулировка подголовника группа 2-3
Наклон автокресла имеет по две позиции.
Graco Nautilus Elite регулировка наклона
Наклон осуществляется нажатием серой клавиши.
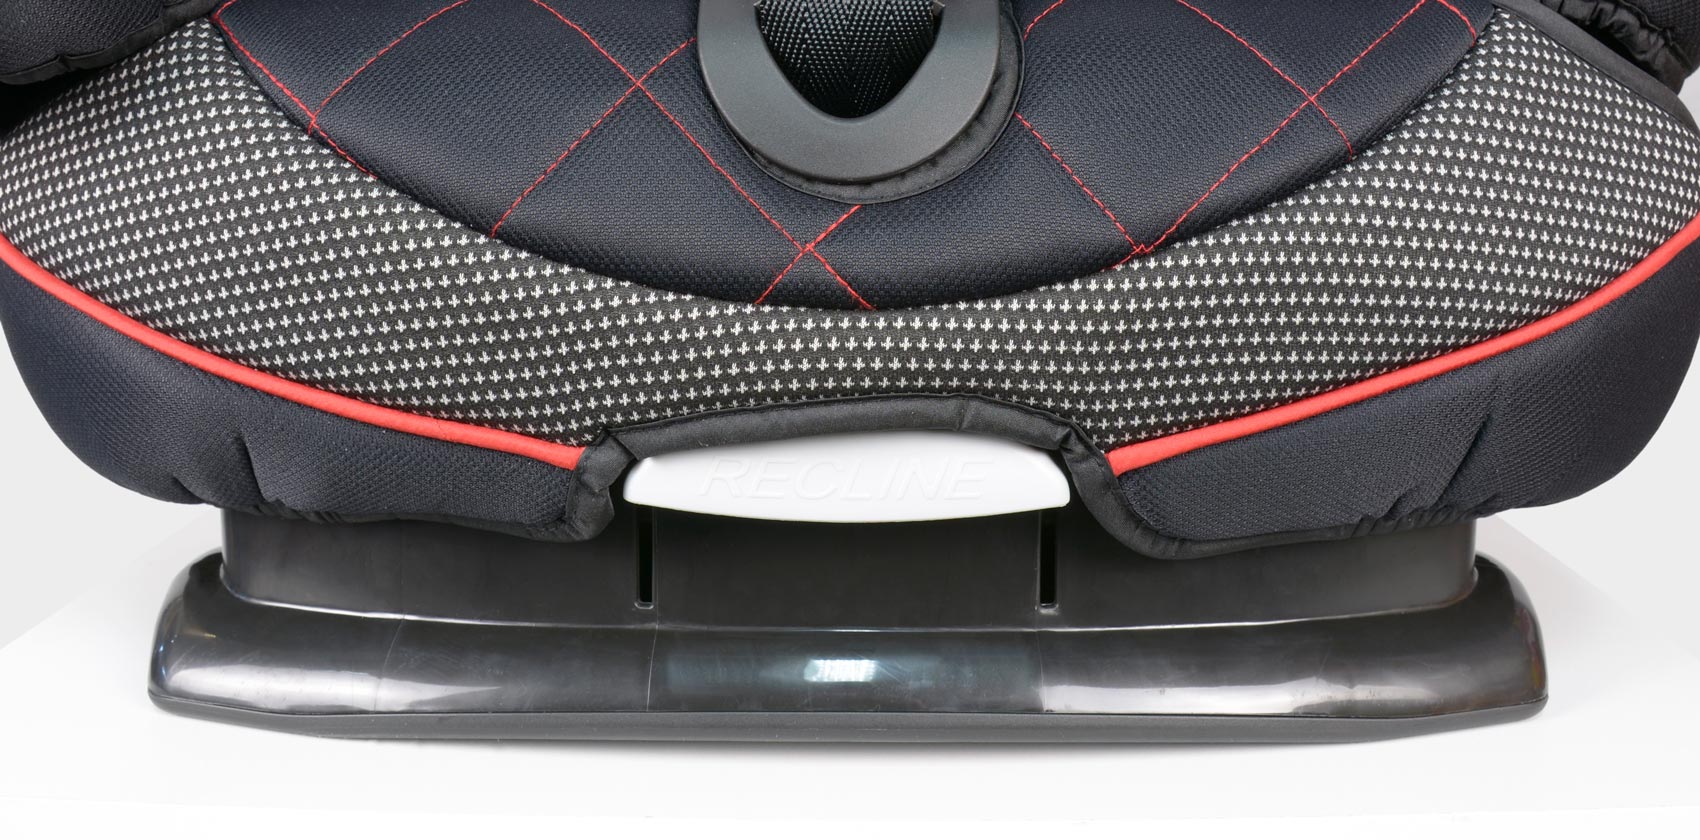
Клавиша наклона Recline
Сборка автокресла
Перед первым использованием требуется сборка автокресла.
Graco Nautilus Elite сборка
Спинка защёлкивается и фиксируется в специальных пазах.
Graco Nautilus Elite сборка
Установка в автомобиле
Nautilus Elite крепится штатным ремнём автомобиля:
- штатным ремнём при установке лицом по ходу движения (для детей весом от 9 до 18 кг)
- штатным ремнём при установке лицом по ходу движения (для детей весом от 15 до 36 кг)
Для крепления автокресла штатным ремнём используются специальные направляющие и фиксаторы для ремня. При правильной установке в автомобиле, автокресло жёстко фиксируется к дивану.
Варианты установки
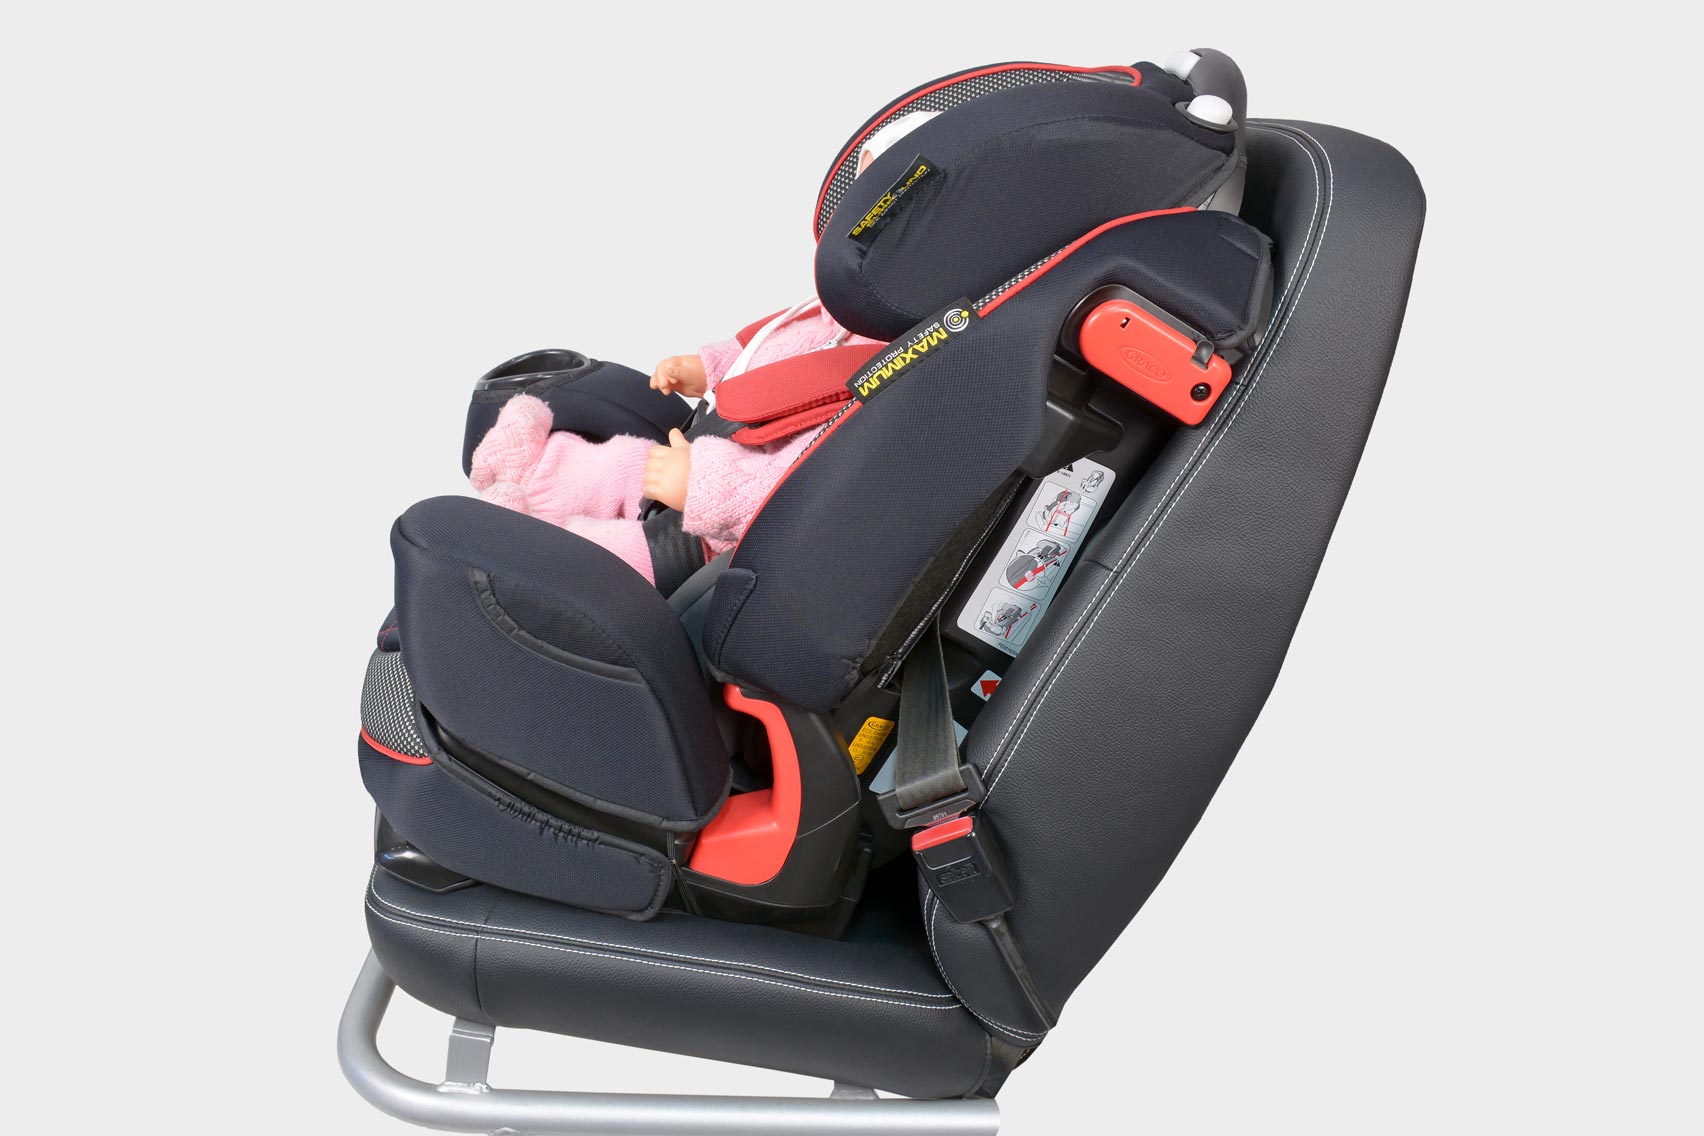
Установка по ходу движения: Группа 1 (от 9 до 18 кг)
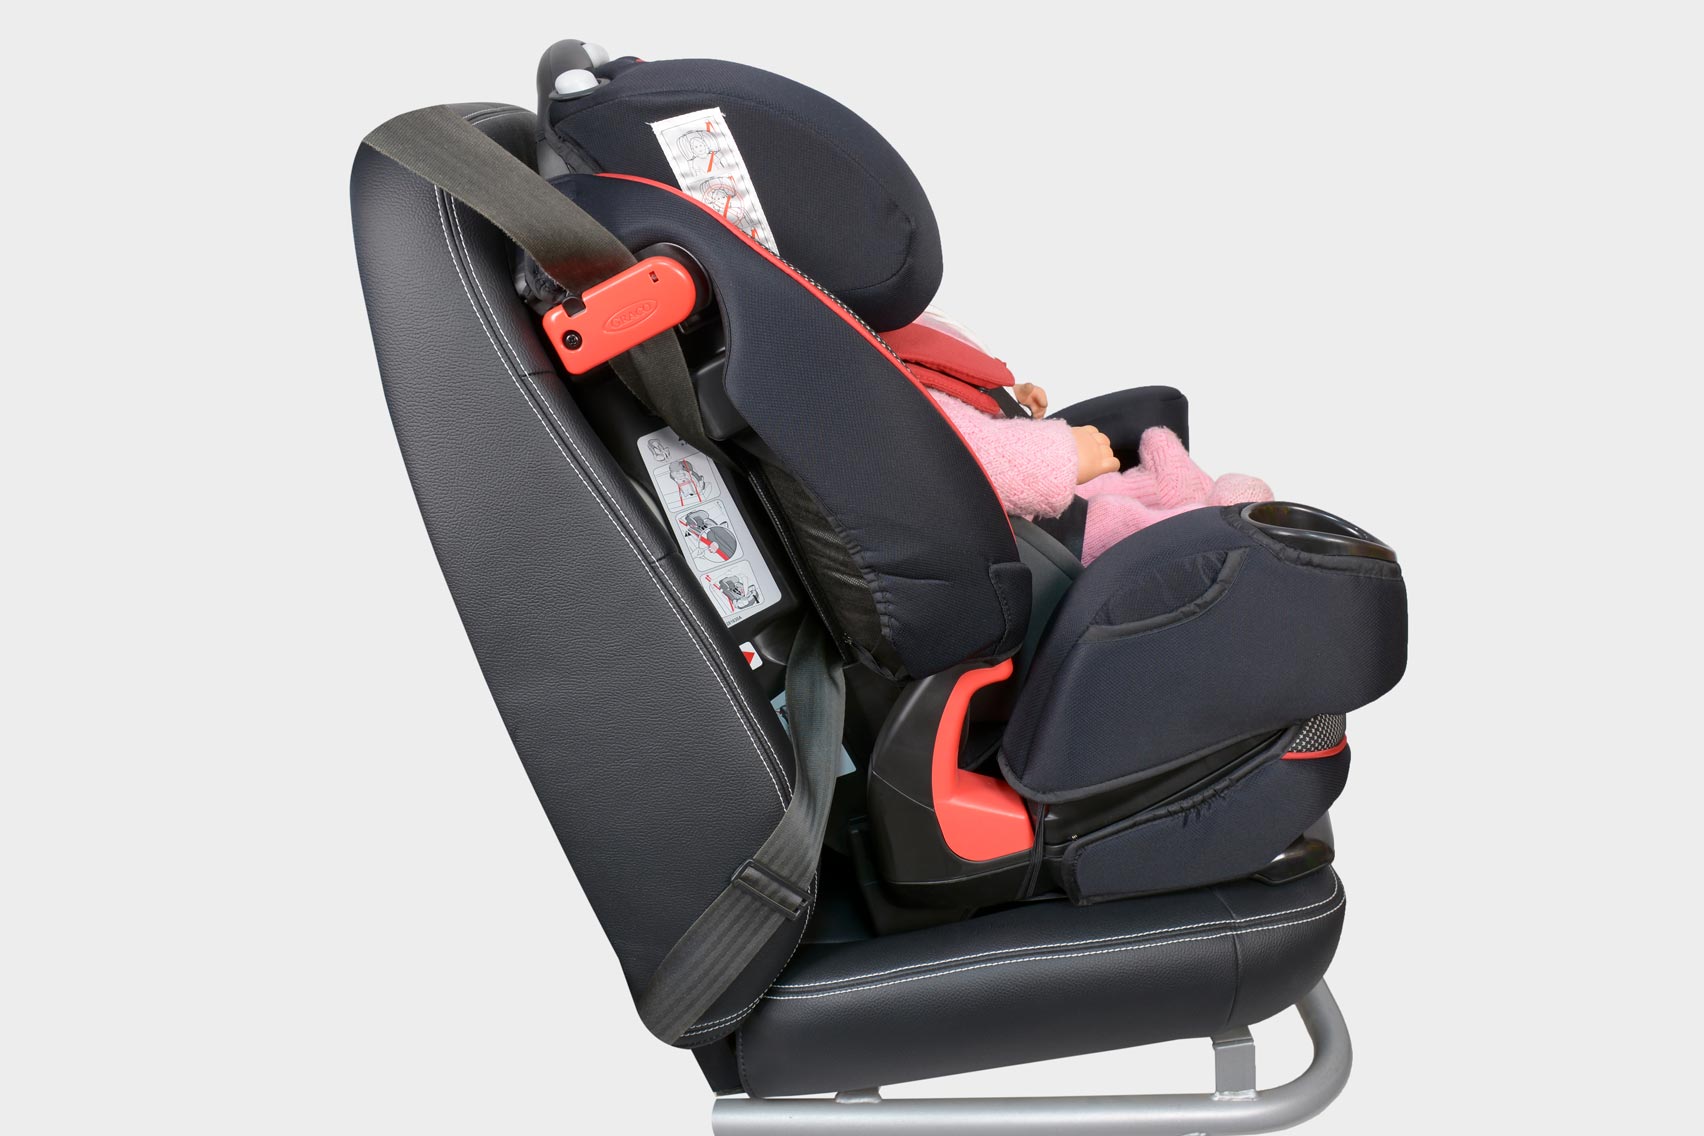
Вид со стороны двери автомбиля
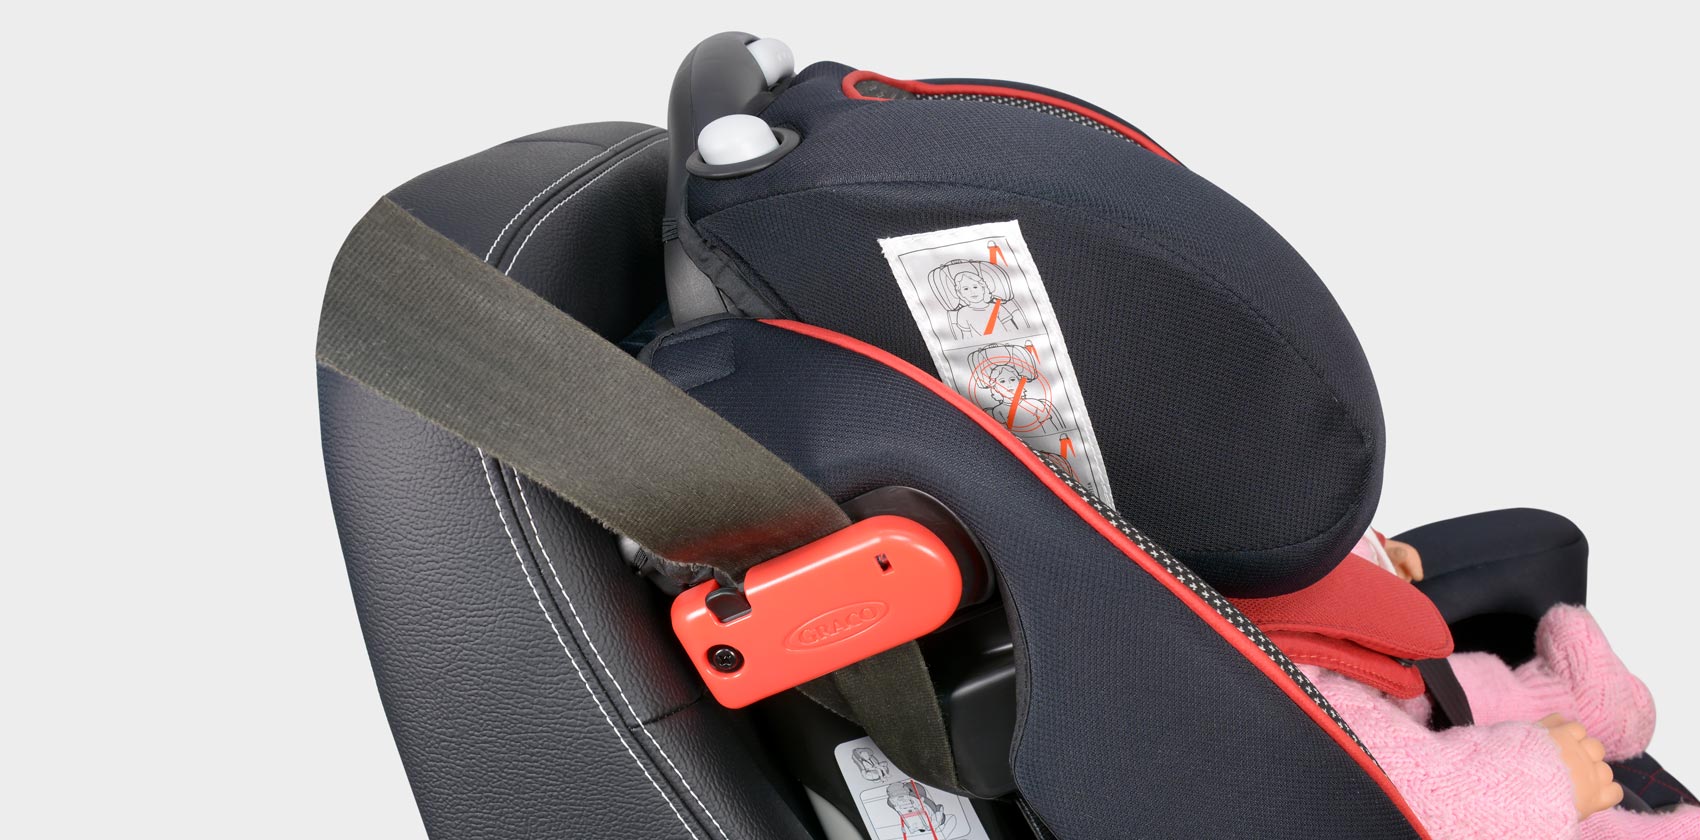
Вид из центра автомобиля
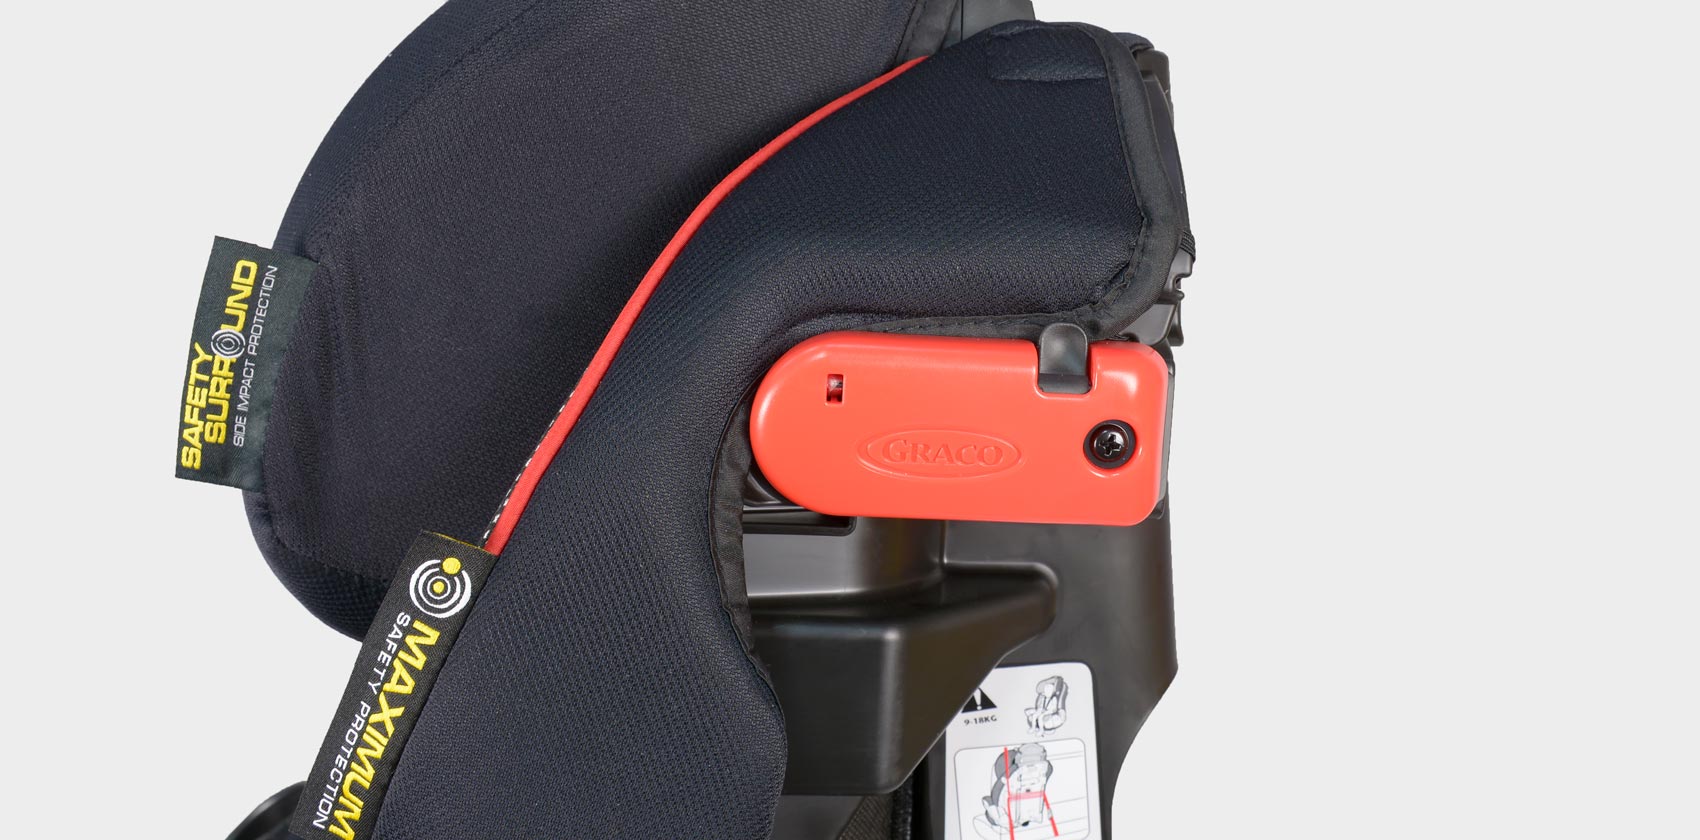
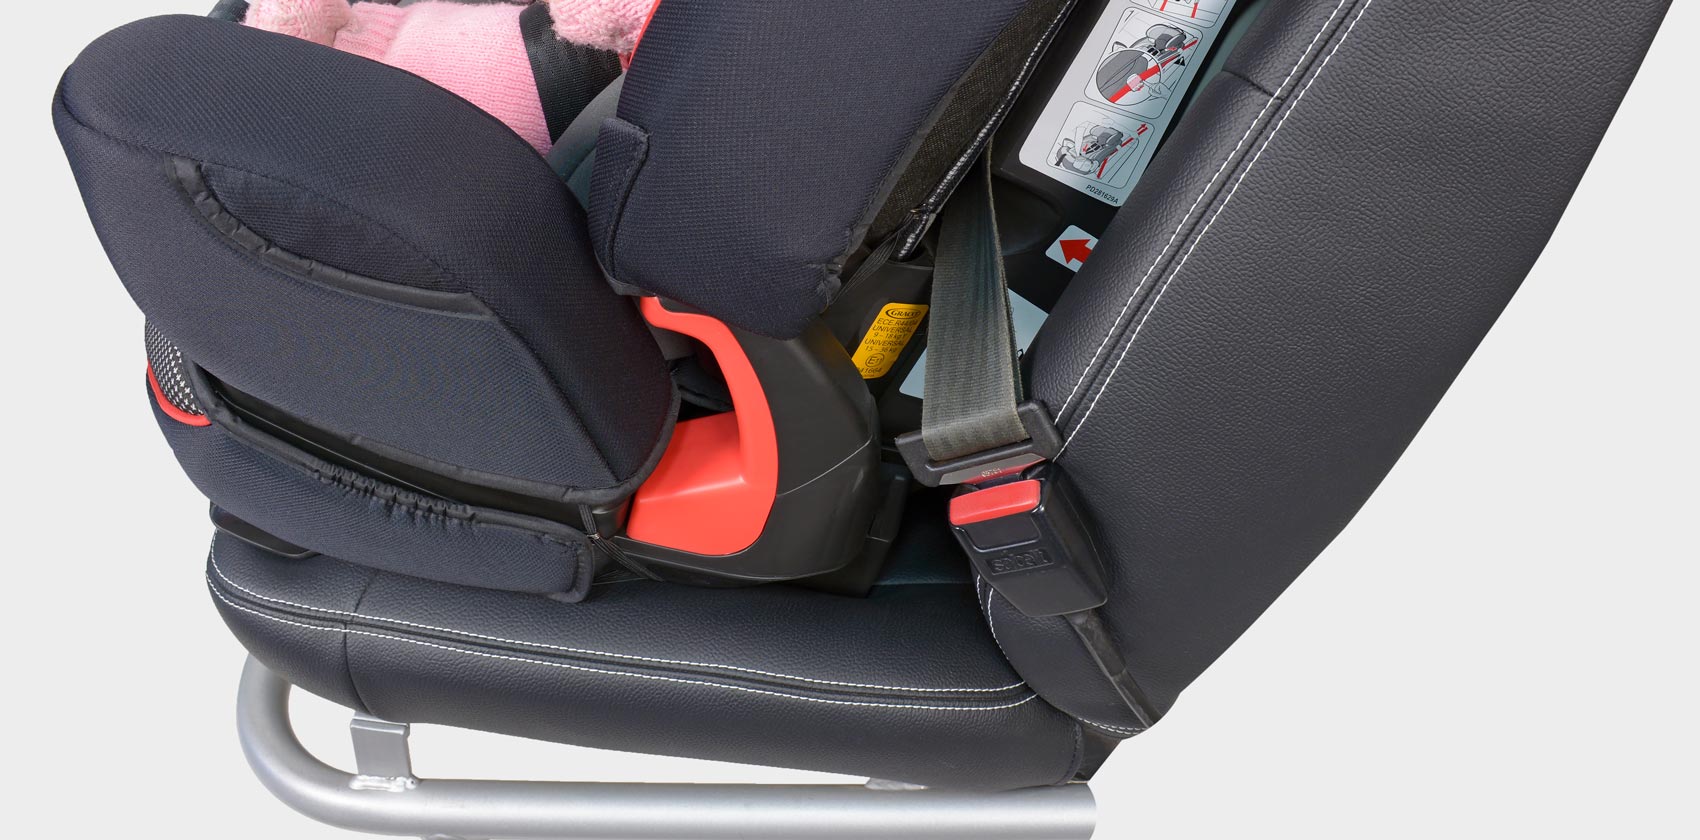
Ремень проходит через красный зажим-фиксатор.
Обе лямки ремня сходятся в одну точку и защёлкивается в замке.
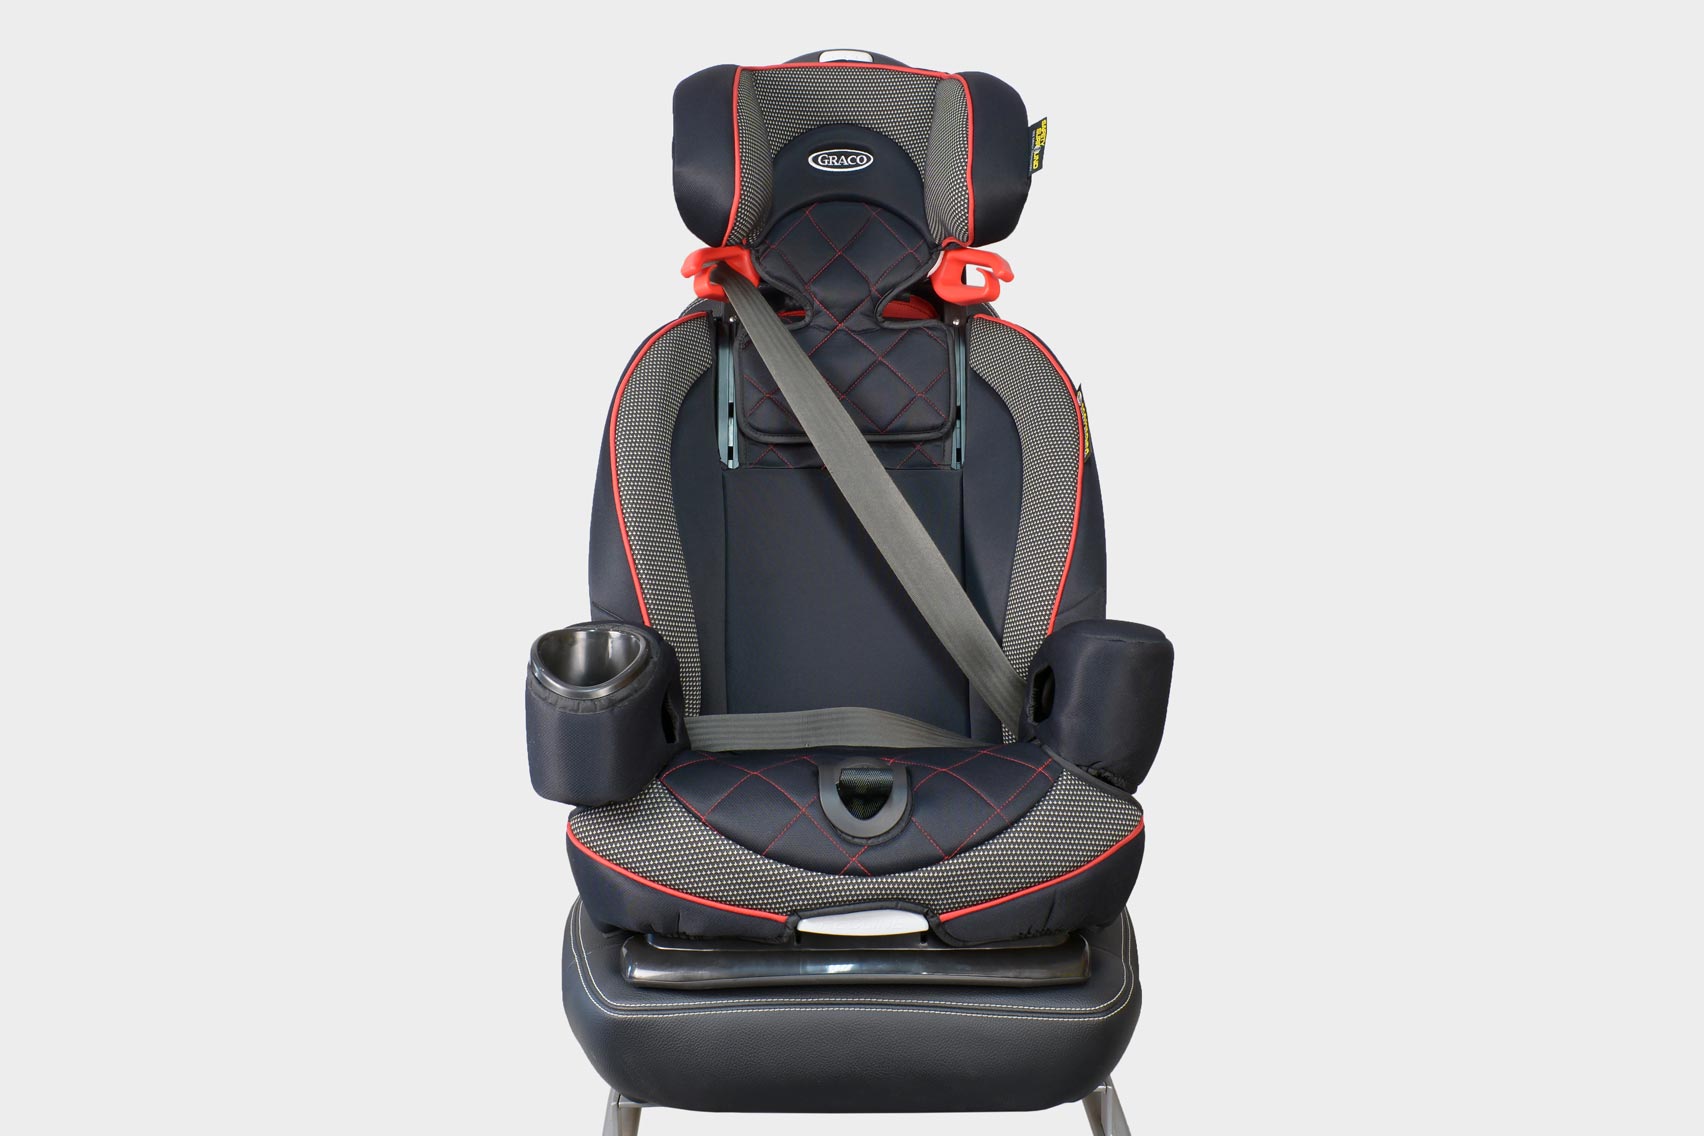
Установка по ходу движения: Группа 2-3 (от 15 до 36 кг)
Ребёнок и кресло крепится штатным трёхточечным ремнём автомобиля. Ремень проходит через специальные направляющие красного цвета.
Фиксация ребёнка
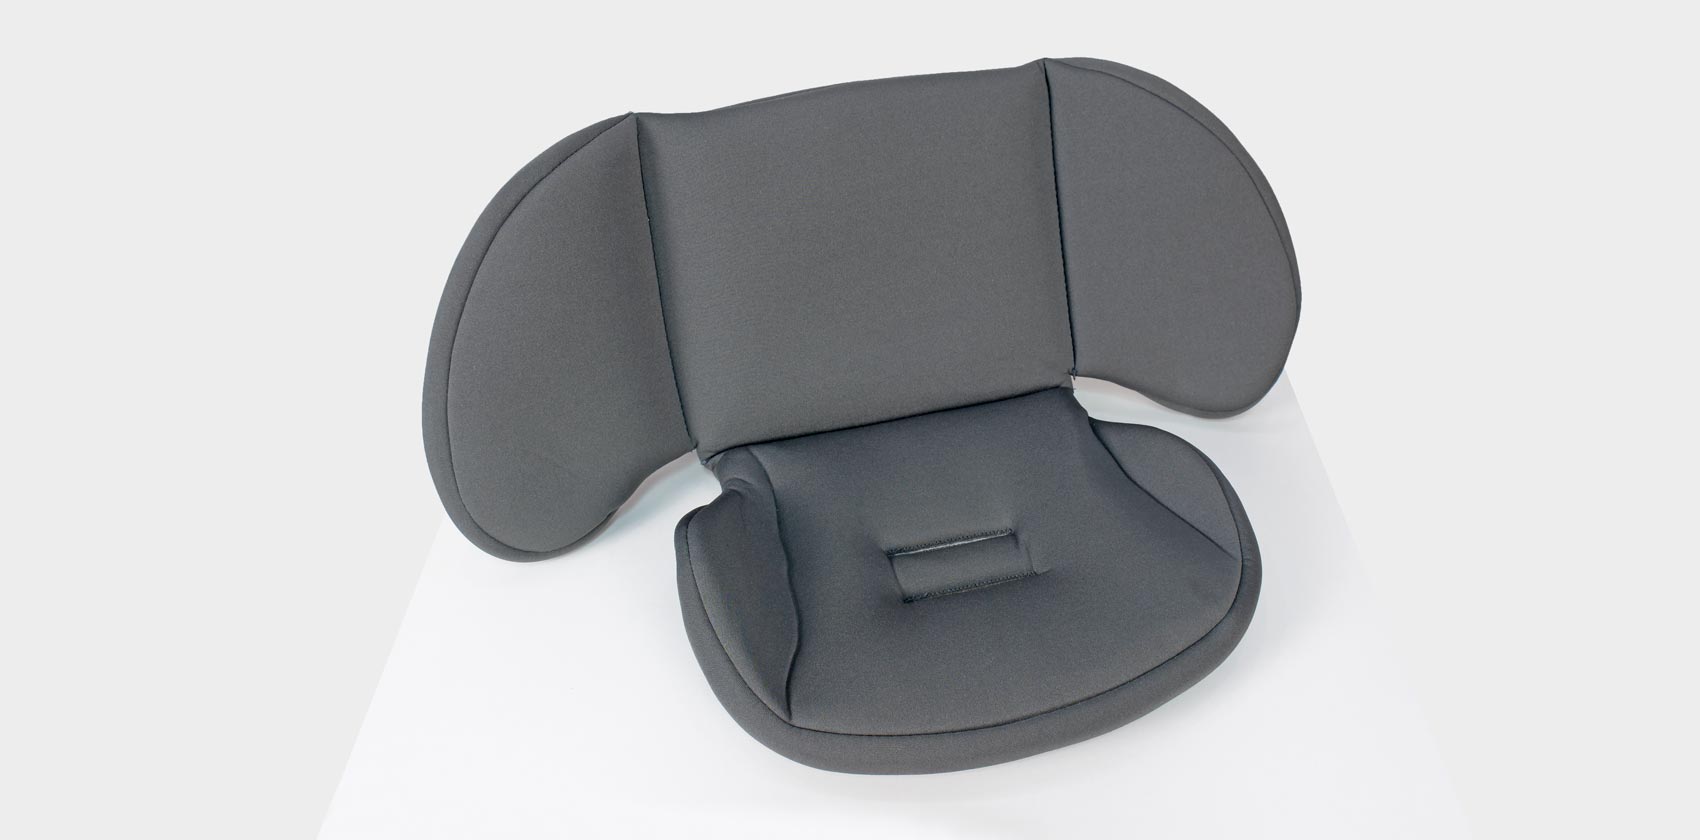
Предусмотрен специальный анатомический вкладыш для маленьких. Вкладыш уменьшает внутренний объём. С ним ребёнок плотно фиксируется в кресле, что обеспечивает большую безопасность.
До четырёх лет ребёнок в автокресле фиксируется 5-точечными ремнями безопасности.
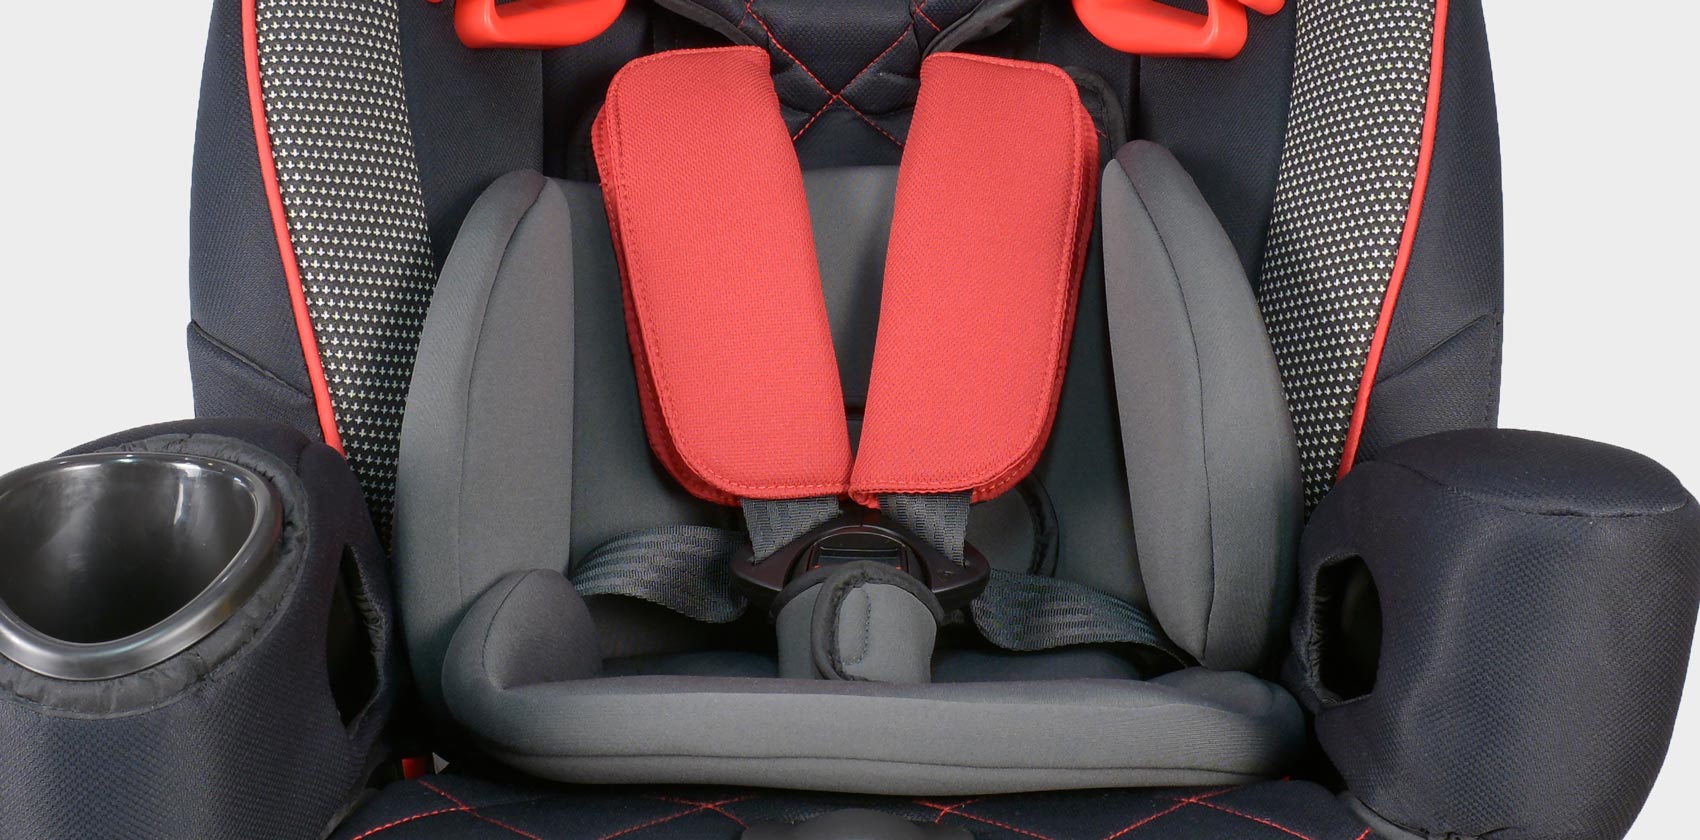
Плечевые ремни оснащены широкими и мягкими накладками, выполненными из плотной нескользящей ткани.
Для удобства посадки ребёнка используются кармашки для язычков замков.
Graco Nautilus Elite фиксация ребёнка, держатели плечевых ремней
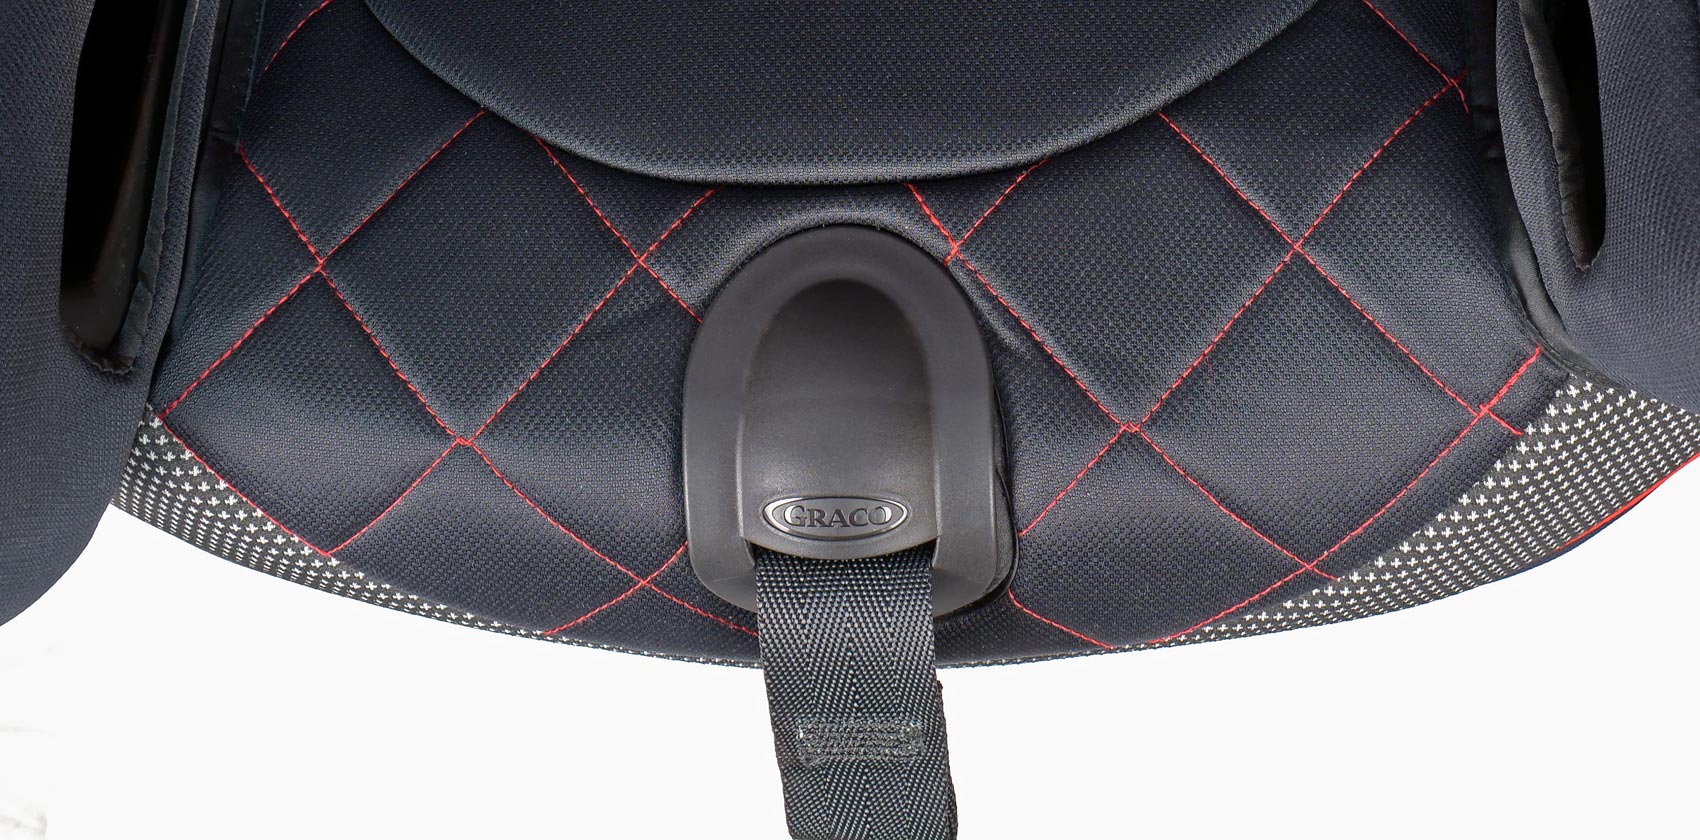
Перед посадкой ребёнка в кресло нужно расстегнуть замок, нажав на красную кнопку в его центре. Далее необходимо вытянуть ремни на всю длину. Ремни вытягиваются с помощью нажатия кнопки в нижней центральной части кресла. После посадки ремни сводятся в одну точку и закрепляются в замке. Замок обрамляет мягкая накладка, которая защищает паховую область ребёнка от травм.
Graco Nautilus Elite фиксация ребёнка
Система ремней затягивается лямкой, расположенной под кнопкой.
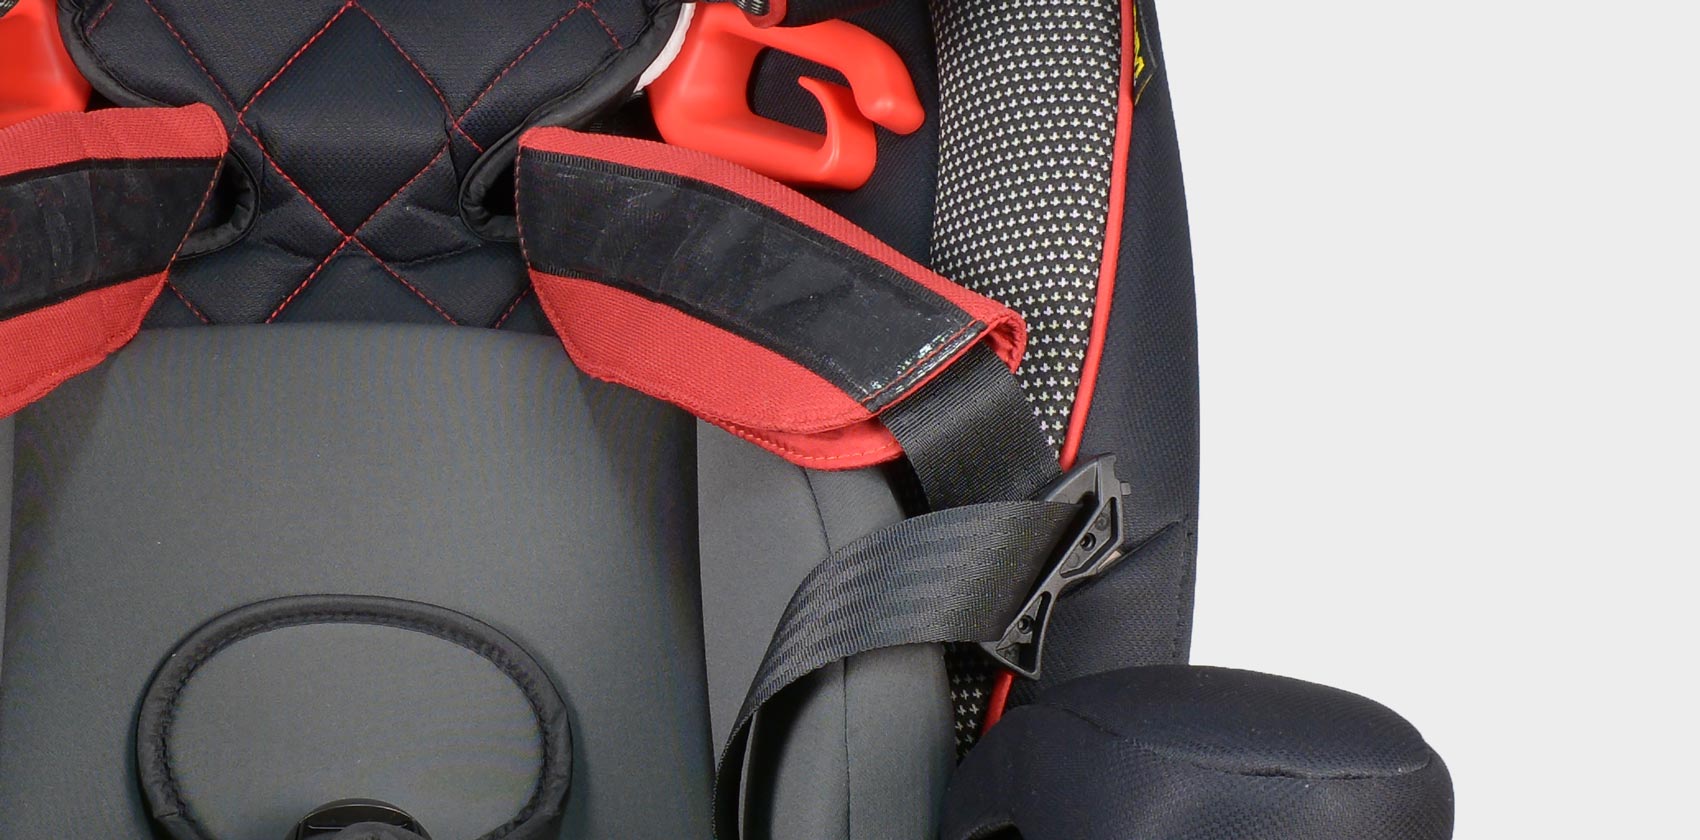
В возрасте от 3-4 лет (рост 100 см) ребёнок фиксируется штатным автомобильным ремнём. Кресло трансформируется в группу 2-3.
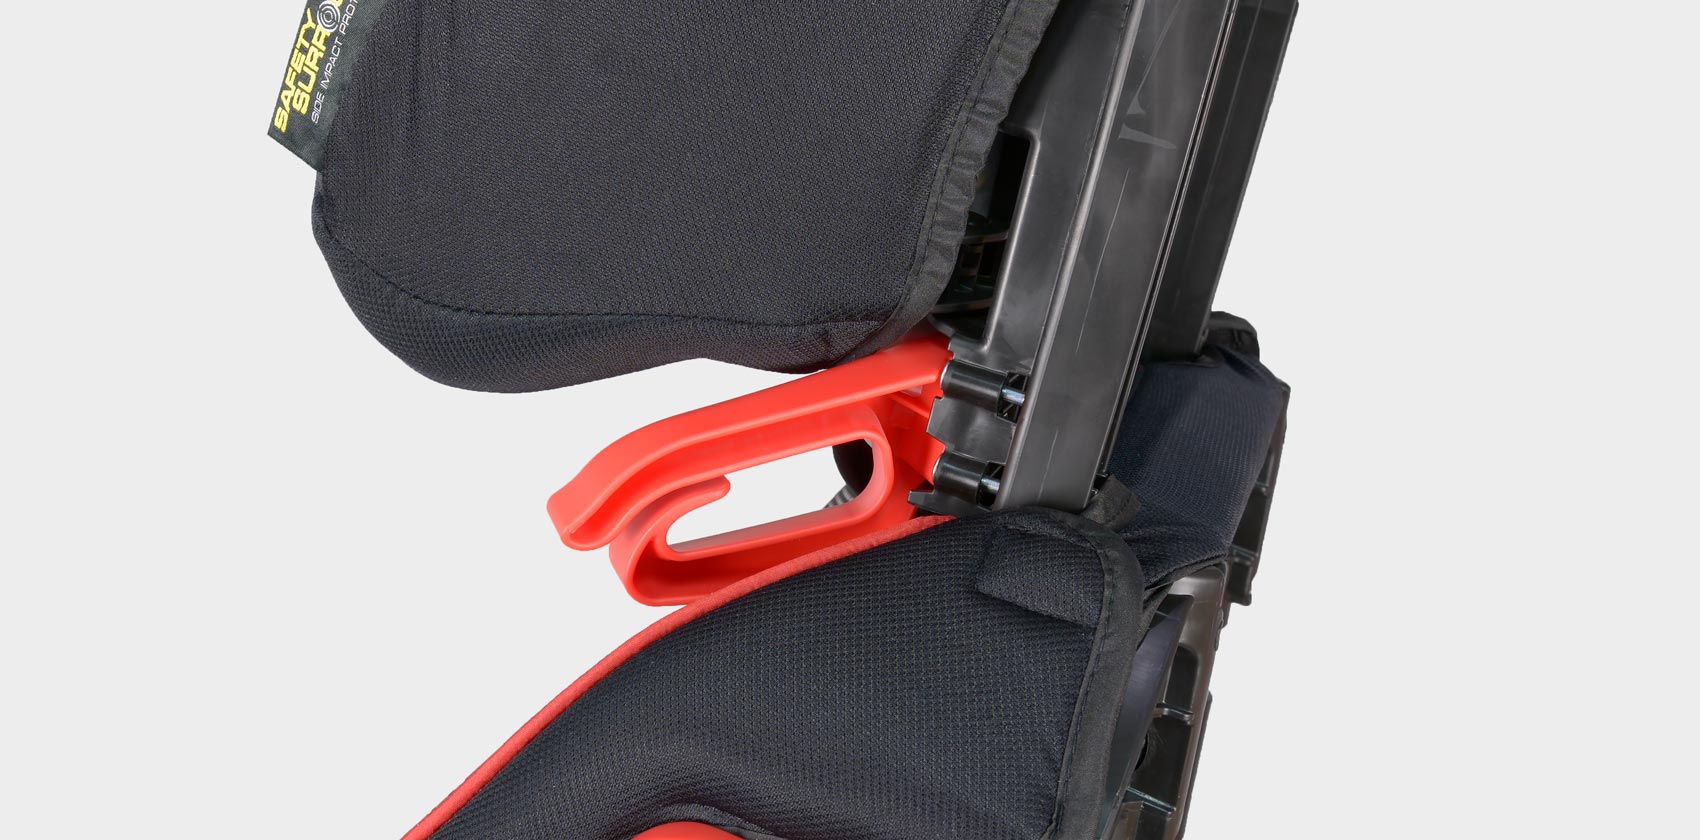
Направляющая для диагонального ремня
Перед тем, как ребёнок сядет в кресло, нужно заранее провести диагональную часть ремня в одну из красных пластиковых направляющих под подголовником. Они находятся с двух сторон и используются в зависимости от того, на каком автомобильном сиденье будет установлено детское кресло.
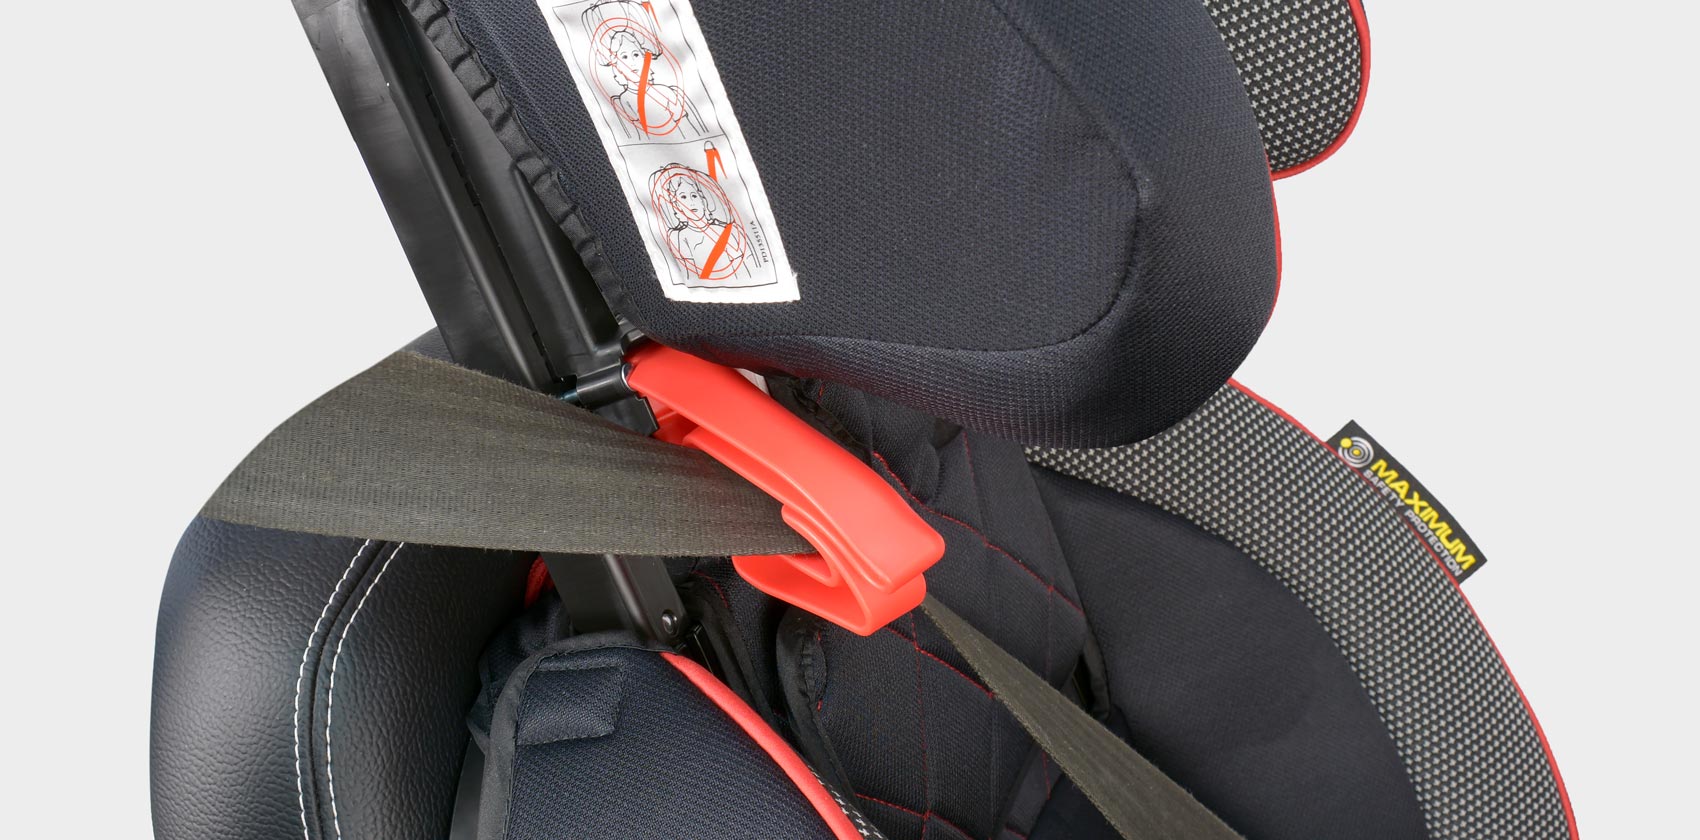
После посадки ребёнка в кресло нужно соединить обе лямки ремня под подлокотником, дотянуть до замка и защёлкнуть. Важно, чтобы ремни были хорошо натянуты и не перекручены. Под подлокотниками есть красные маркеры, которые направляют ремень безопасности.
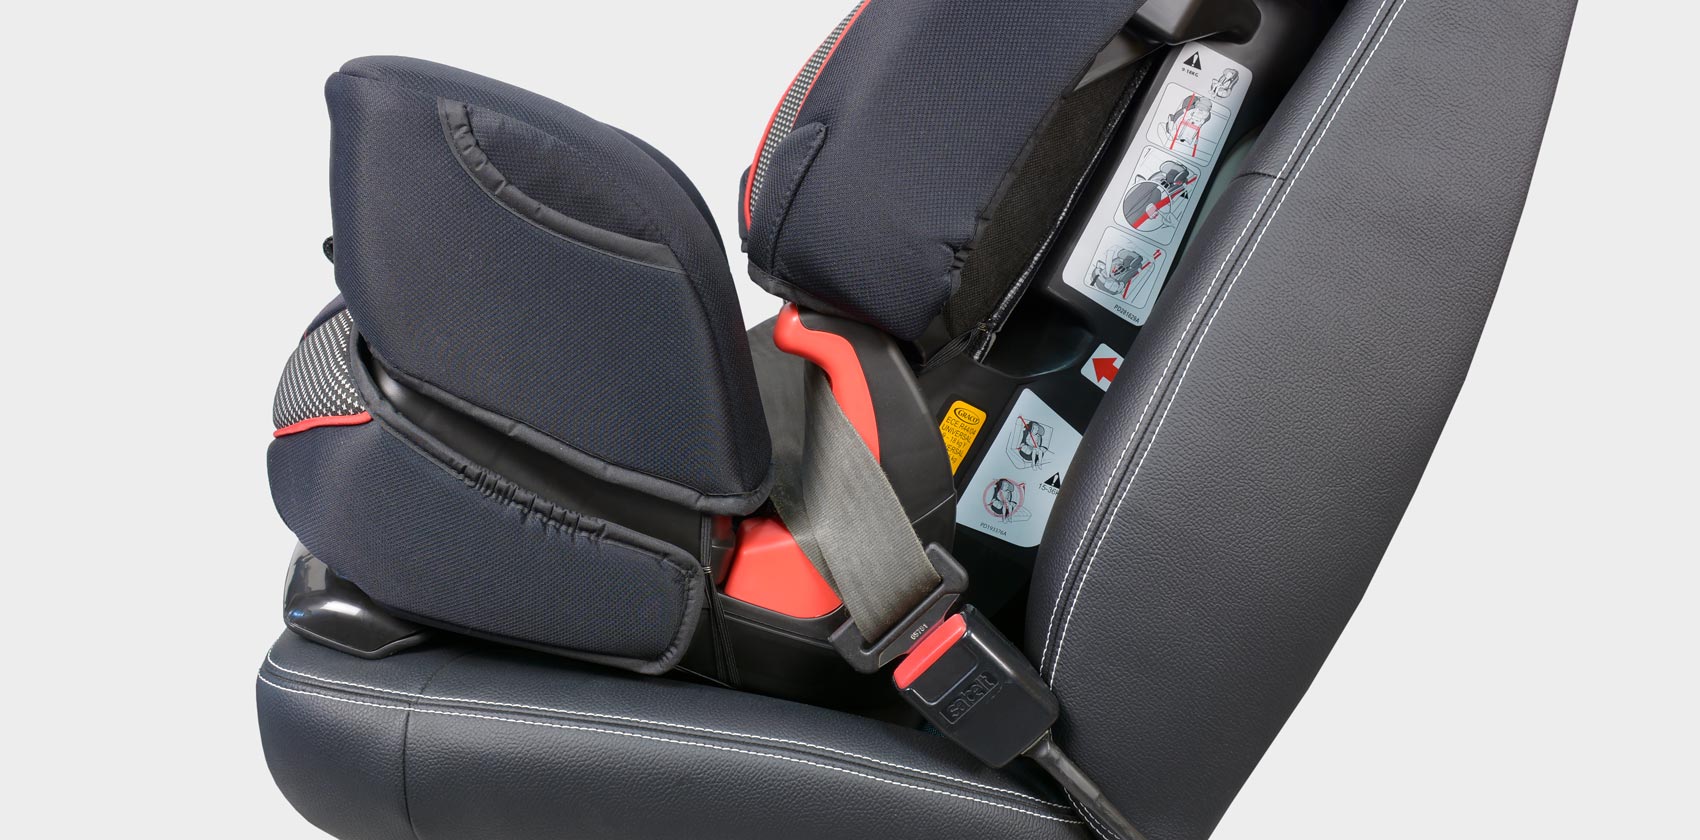
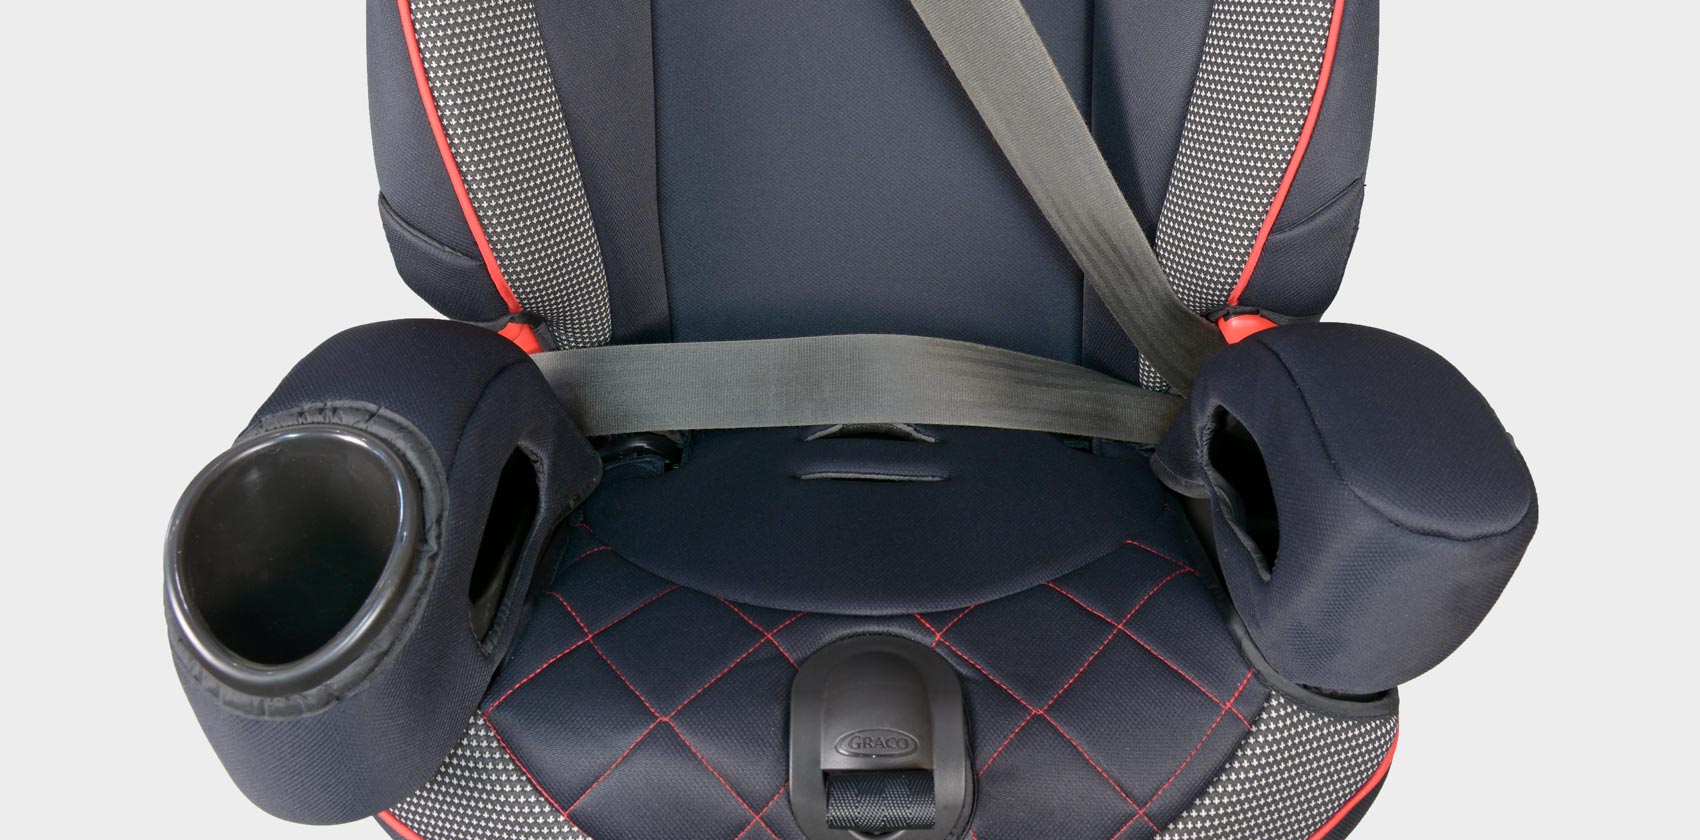
Расположение поясного ремня
Качество материалов
Качество ткани у кресла на самом высоком уровне, в её состав входит органический хлопок. Ткань мягкая, приятная на ощупь, не раздражает кожу.
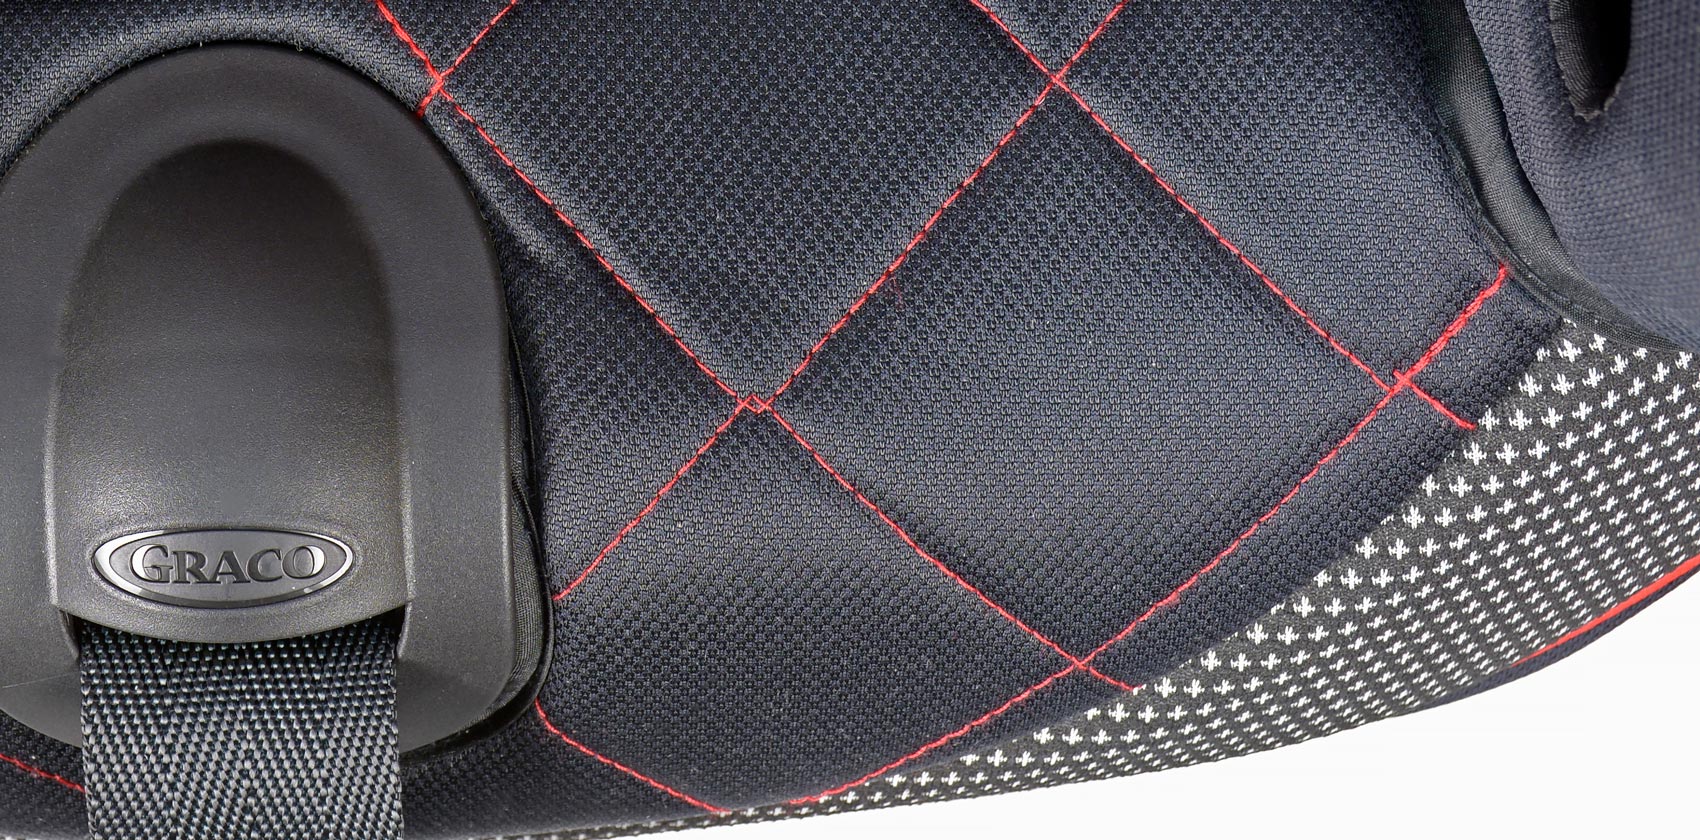
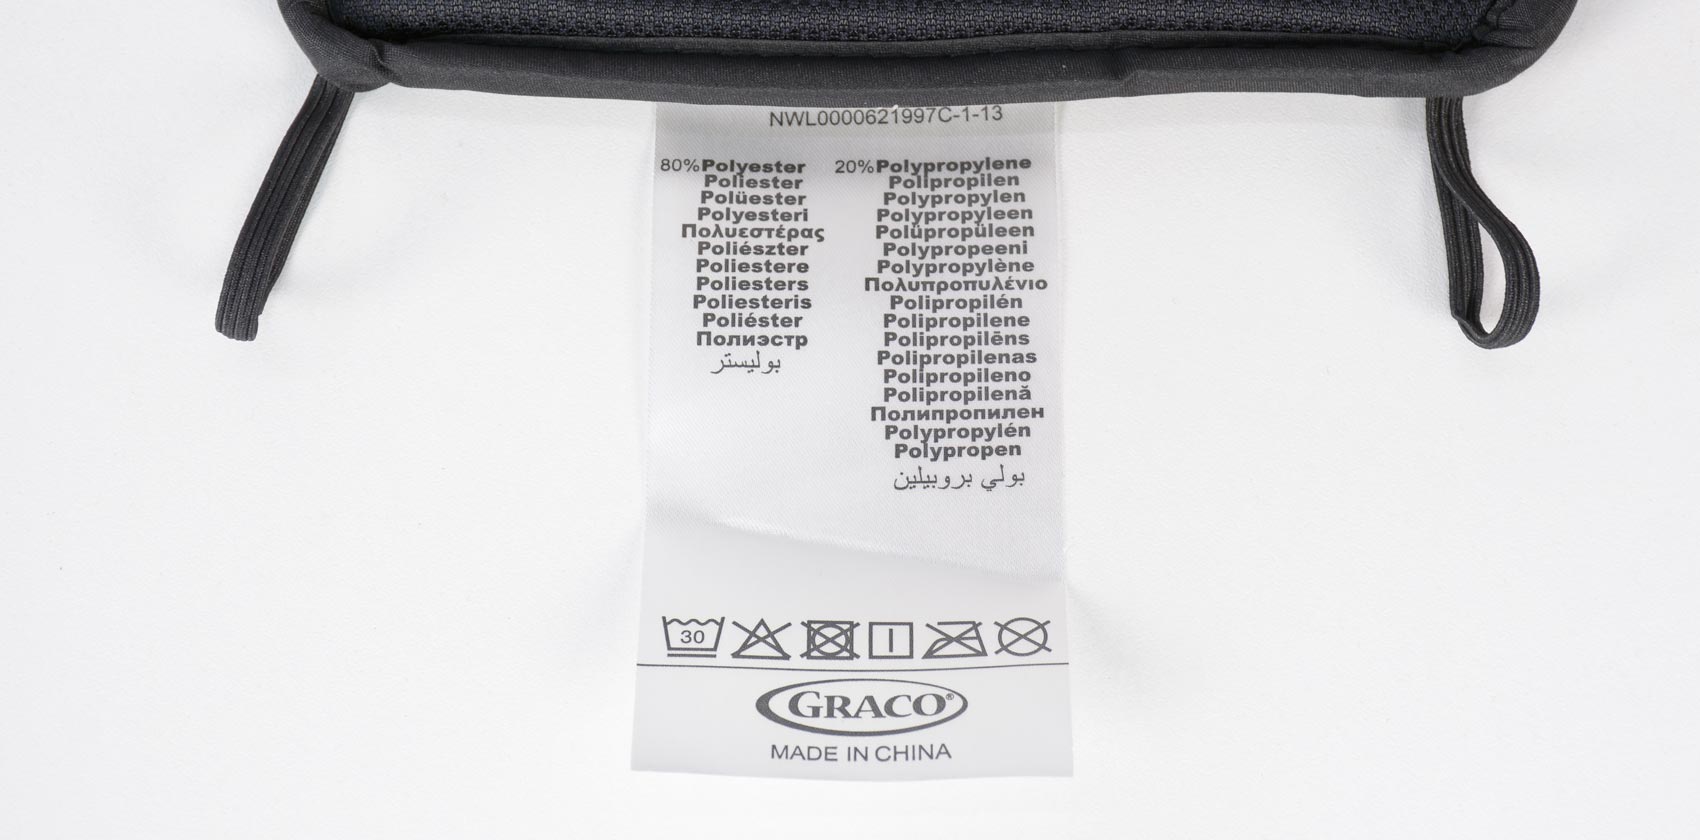
Чехол автокресла легко снимается, его можно постирать в машинке при температуре (деликатная стирка).
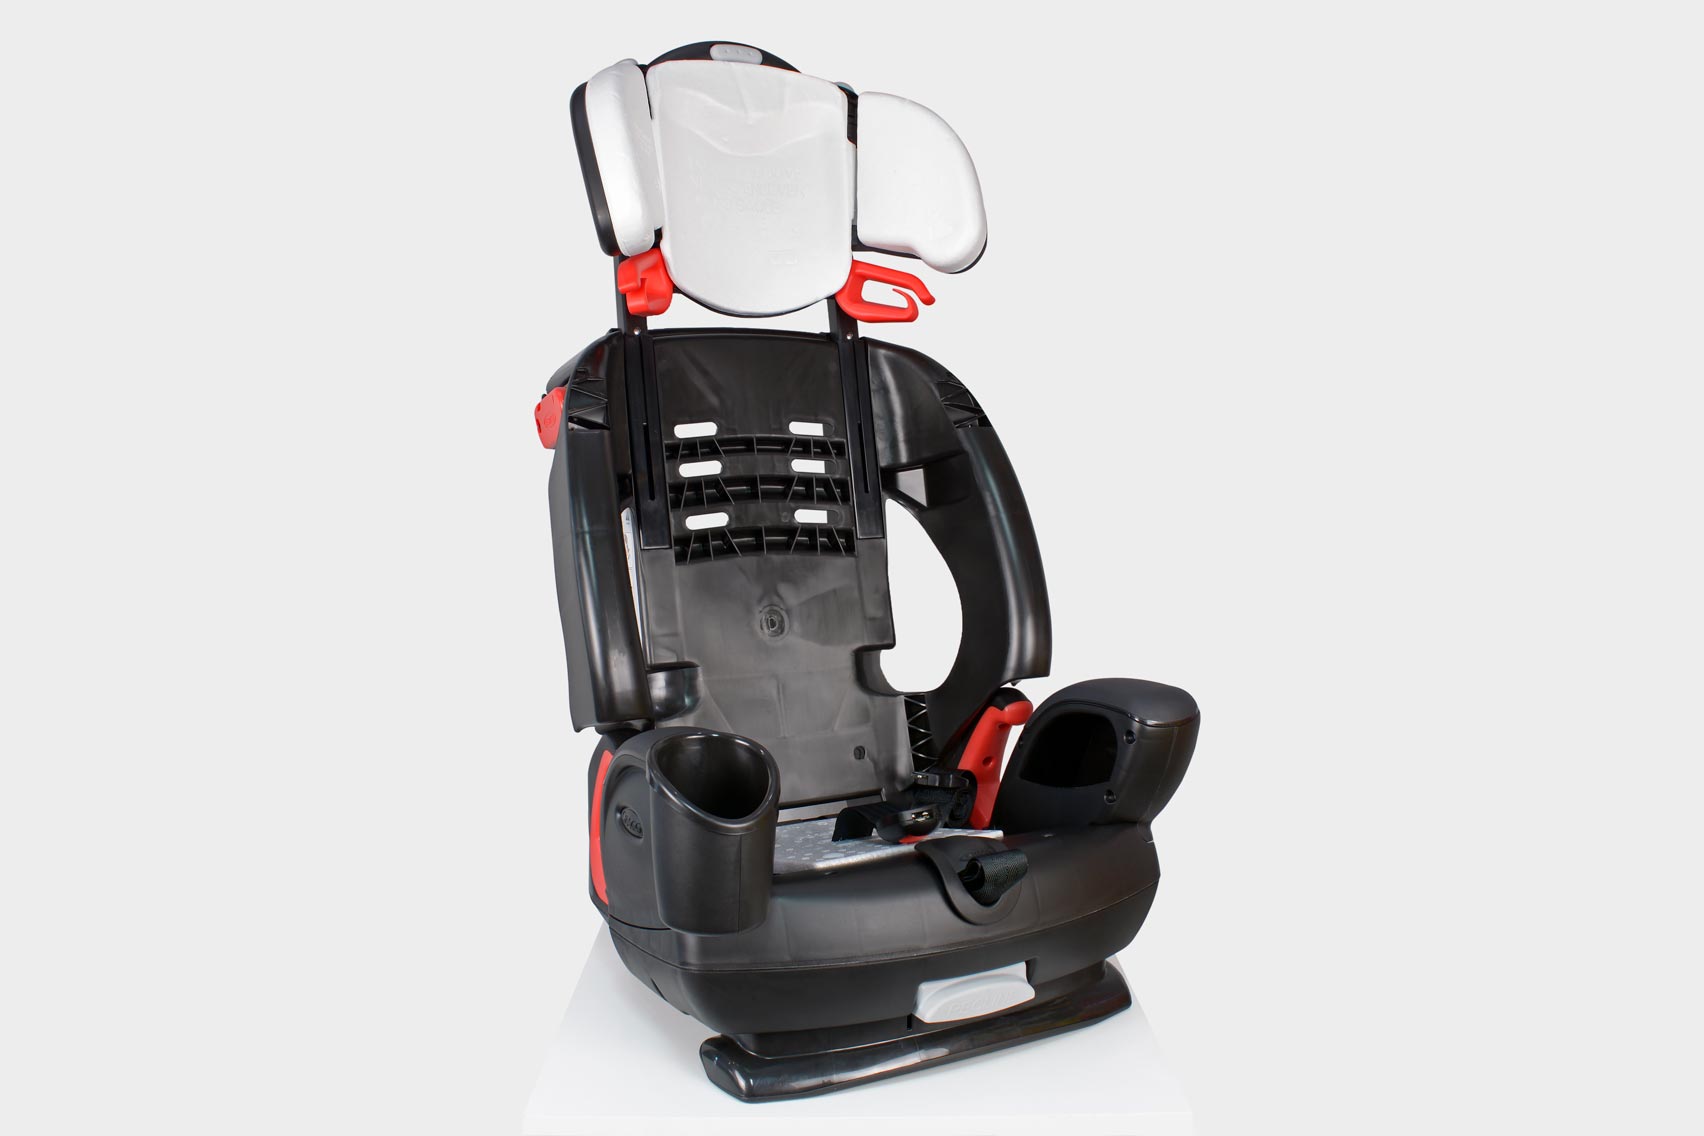
Каркас автокресла изготовлен из ударопрочного пластика. На подголовнике зафиксирован пенопласт. Материалы вибропоглощающие, обеспечивающие гашение удара.
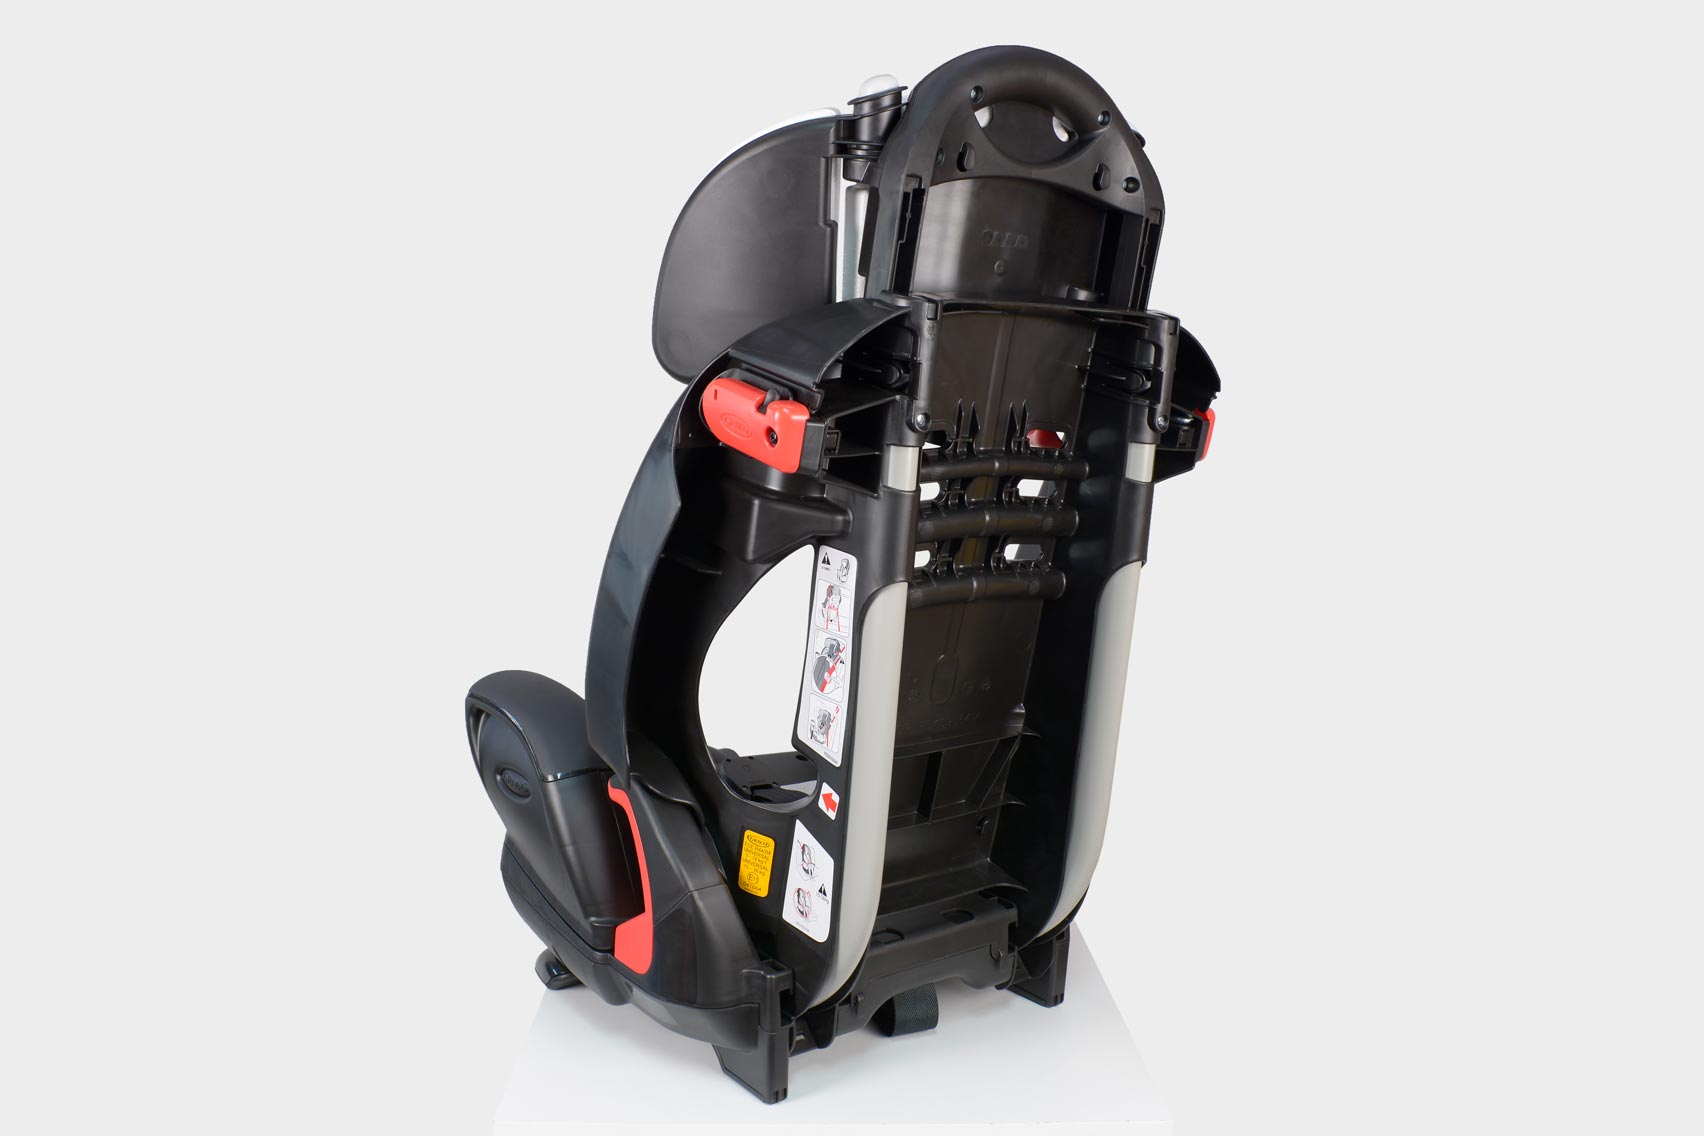
В конструкции используется металлическая рама.
Инструкции
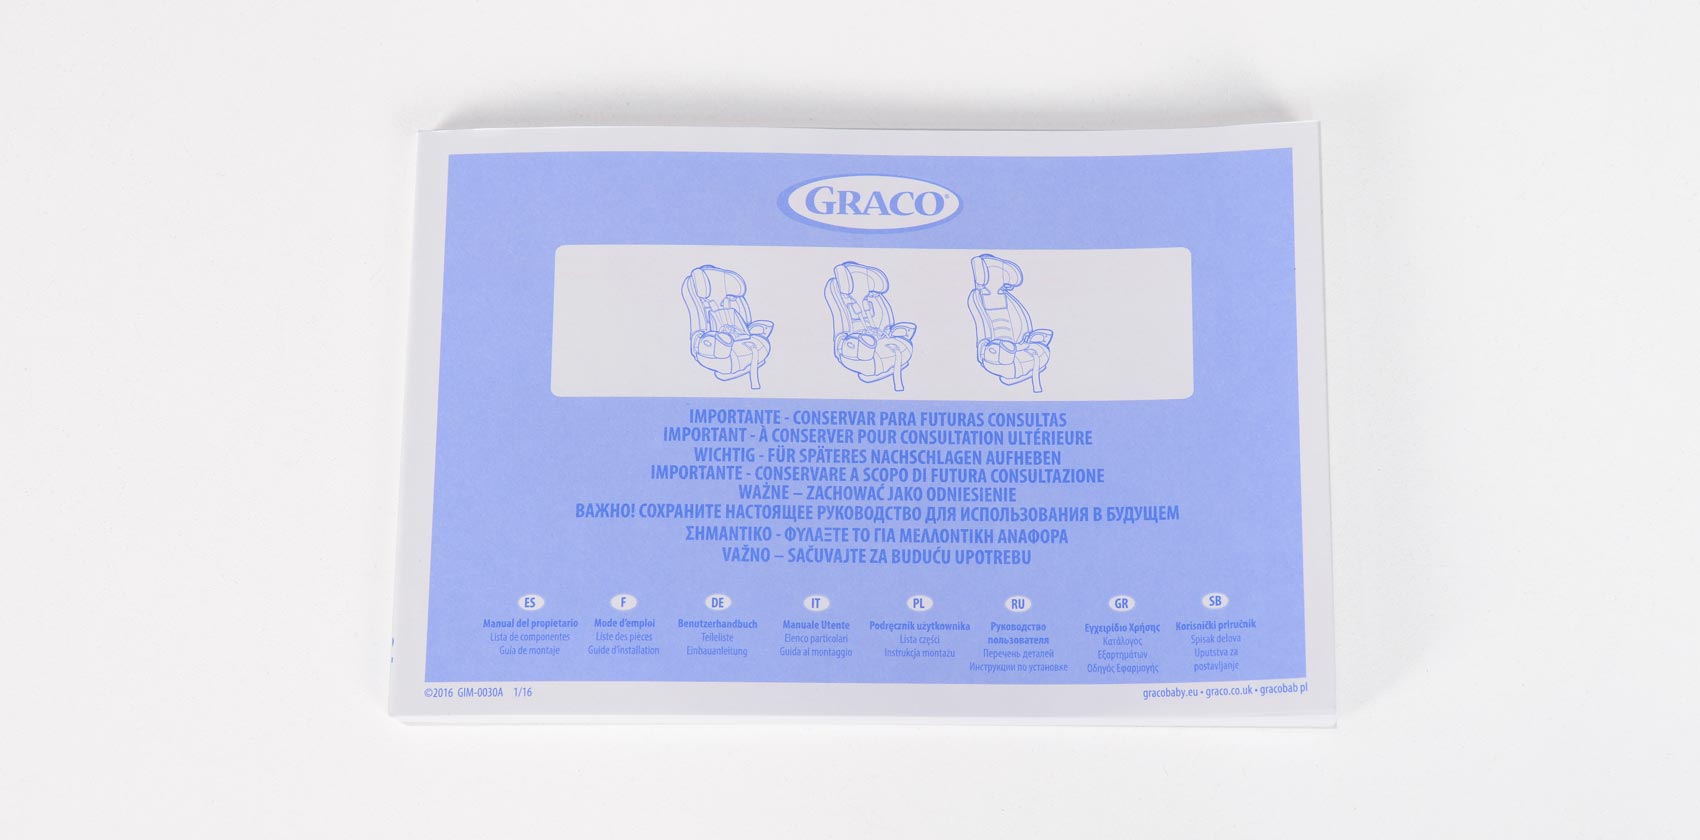
В комплект входит инструкция на русском языке.
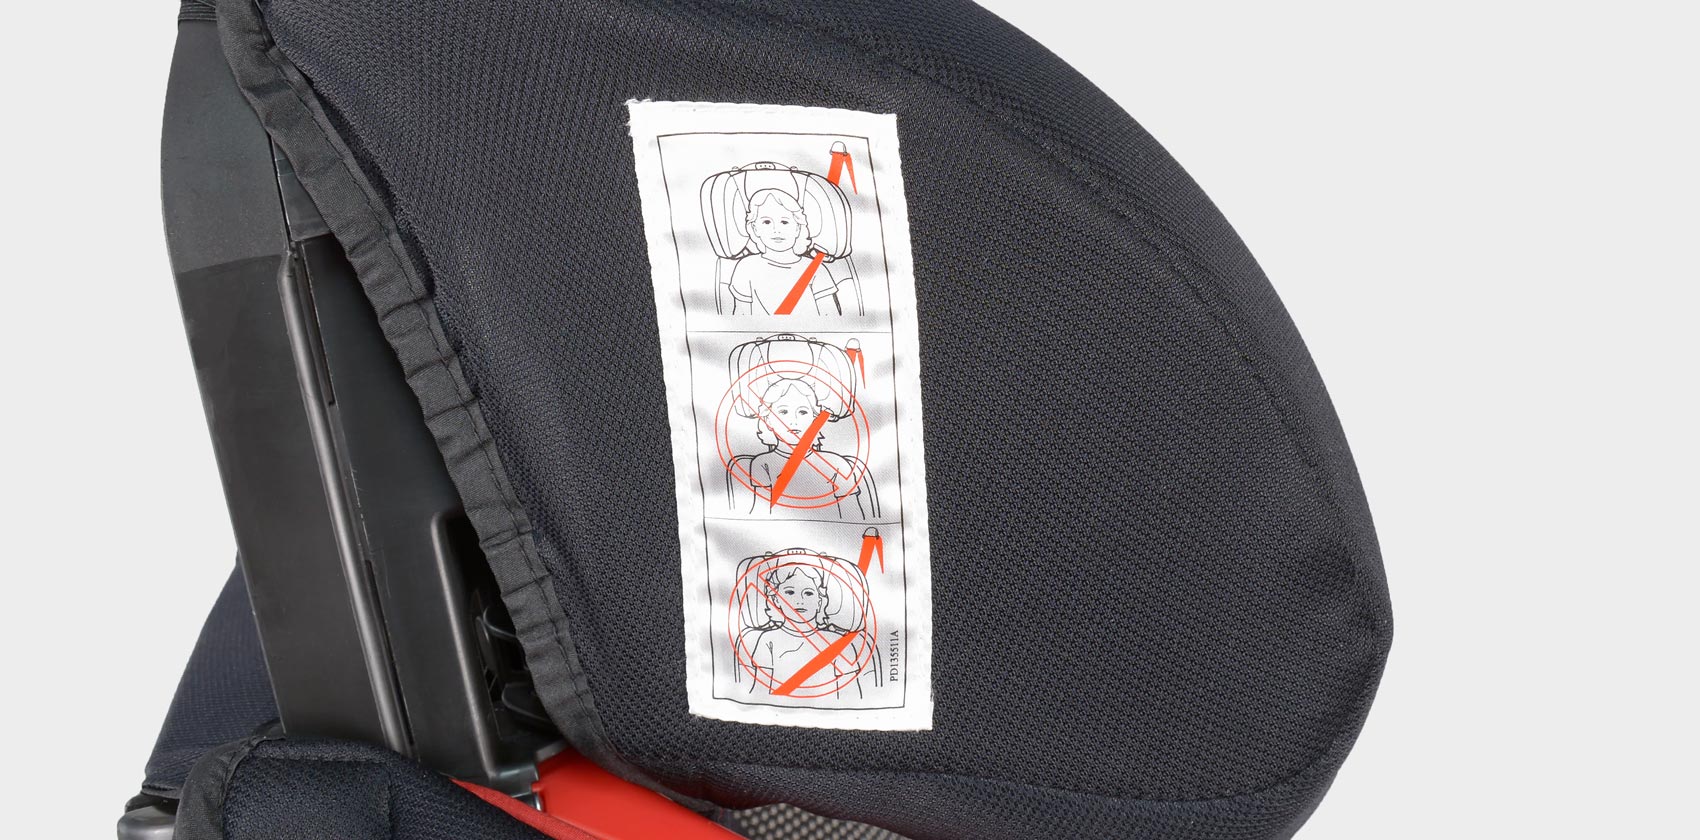
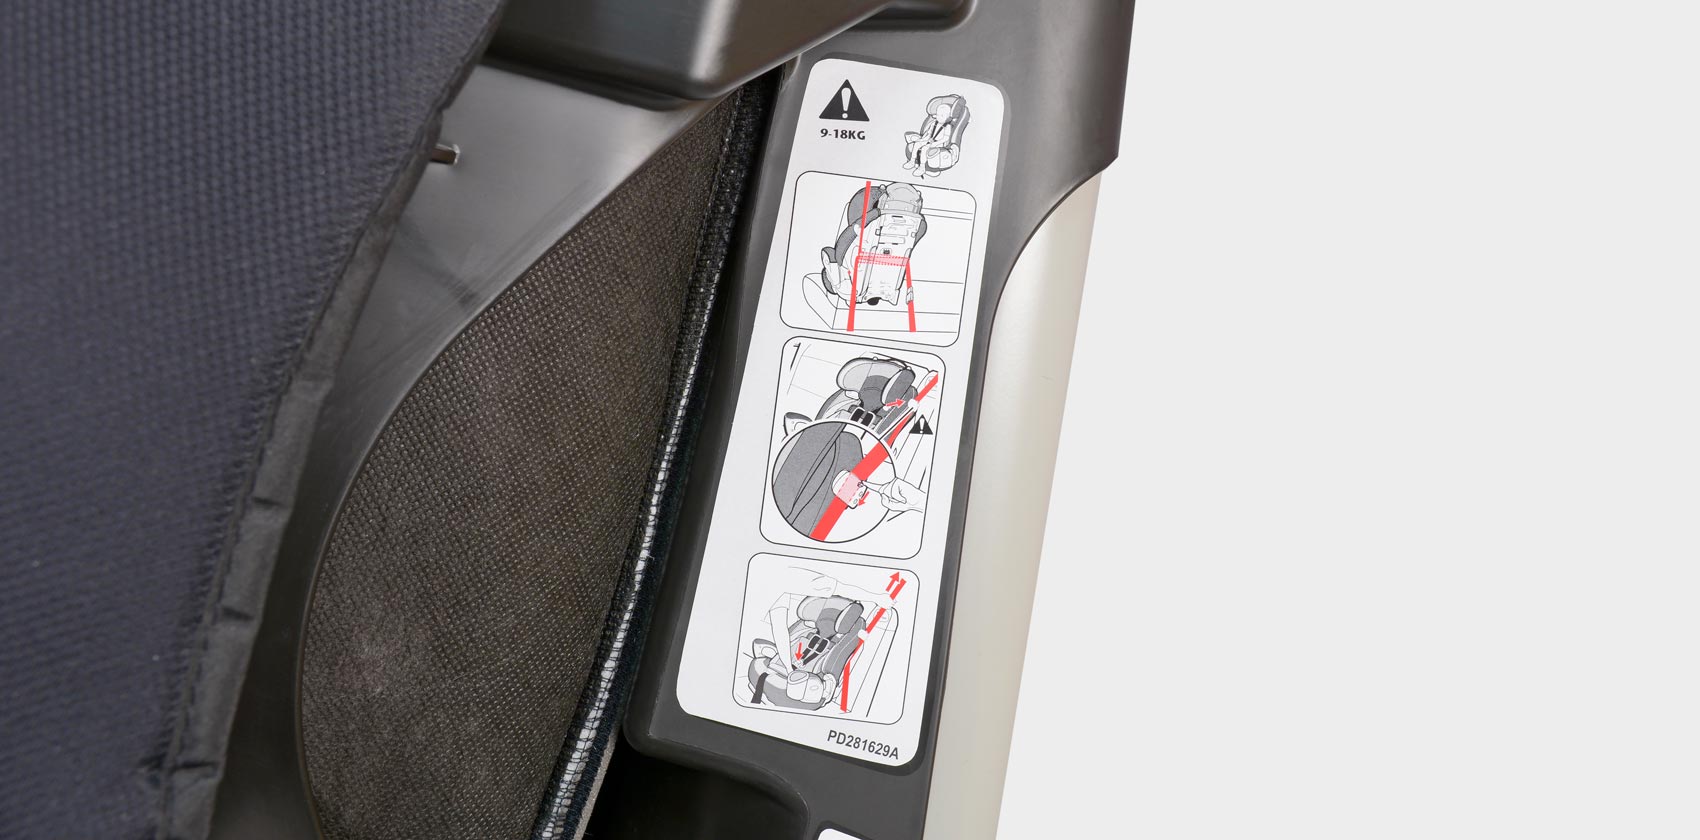
На боковых частях кресла располагаются пиктограммы с информацией по установке. Схемы крепления максимально просты и понятны.
Инструкции по установке.
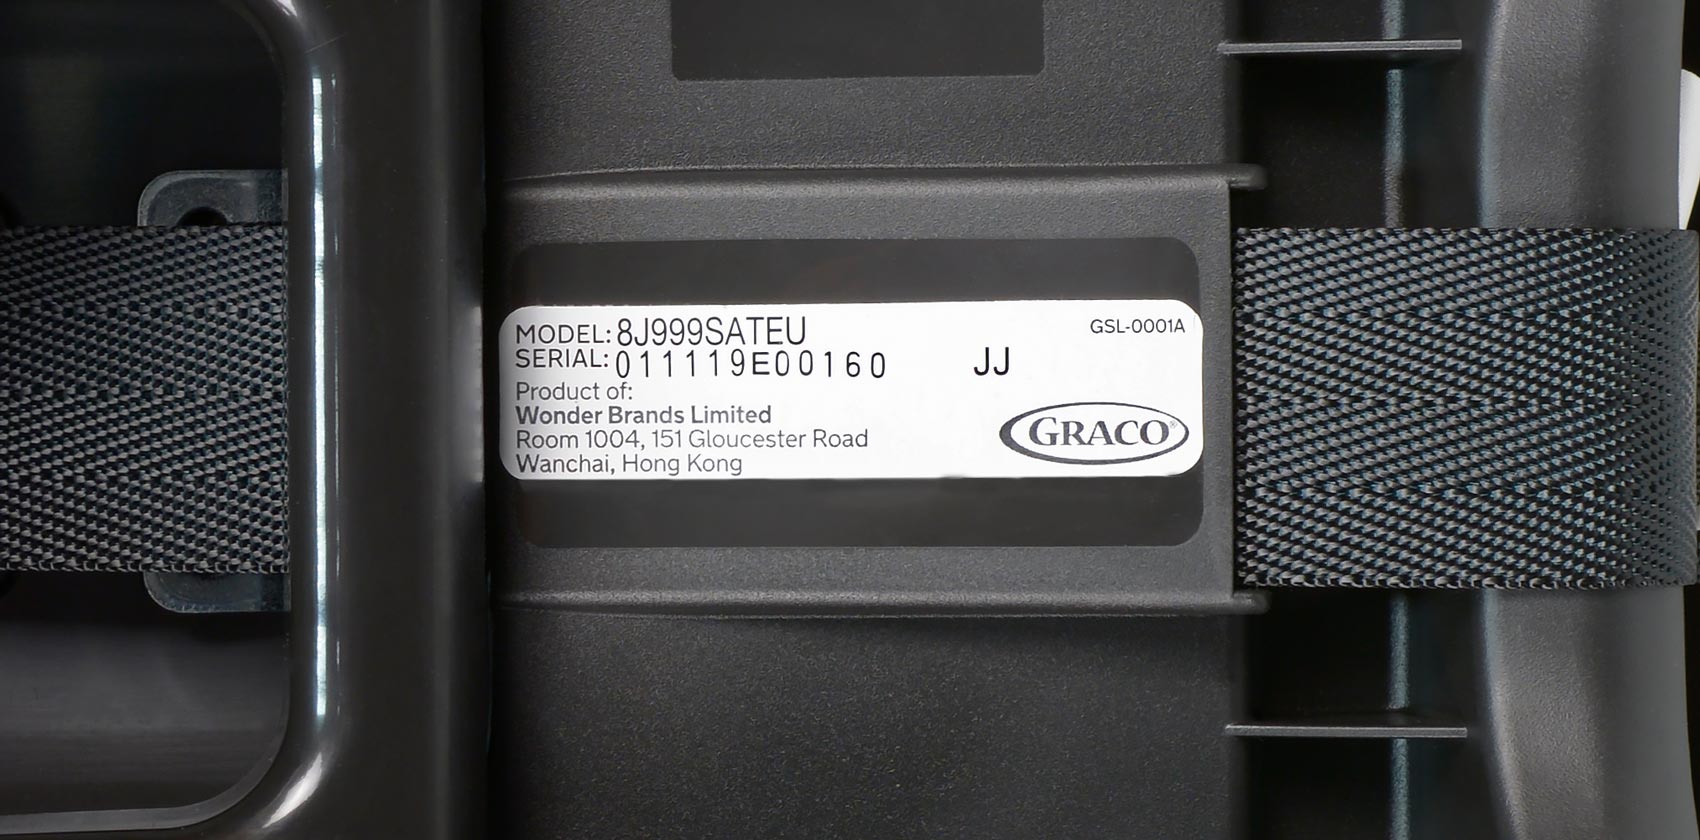
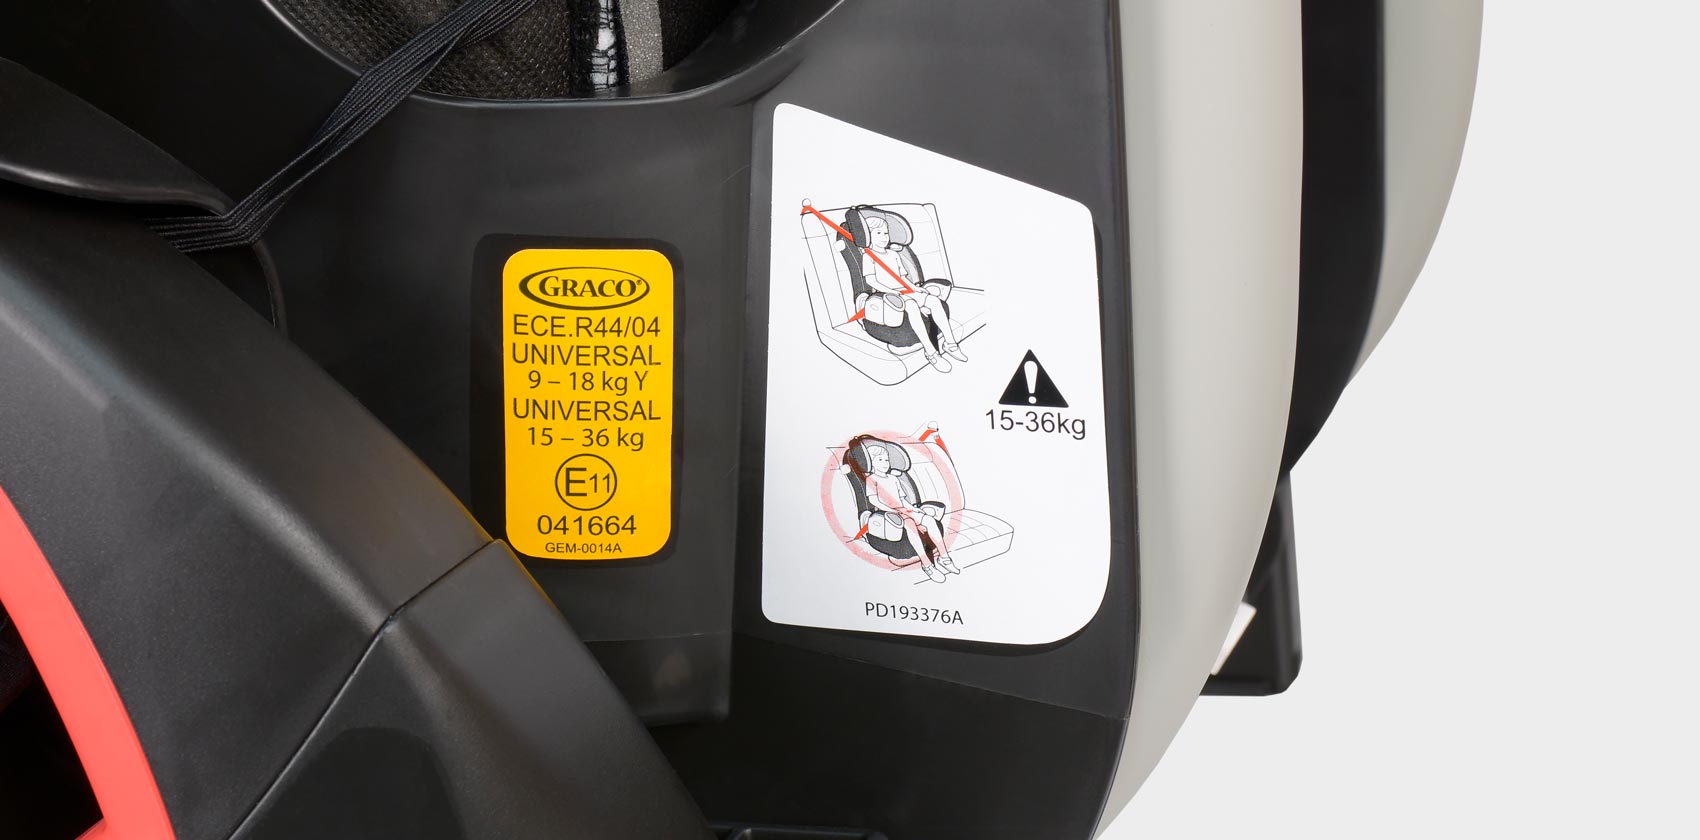
Сертификация ECE R 44/04
Аксессуары
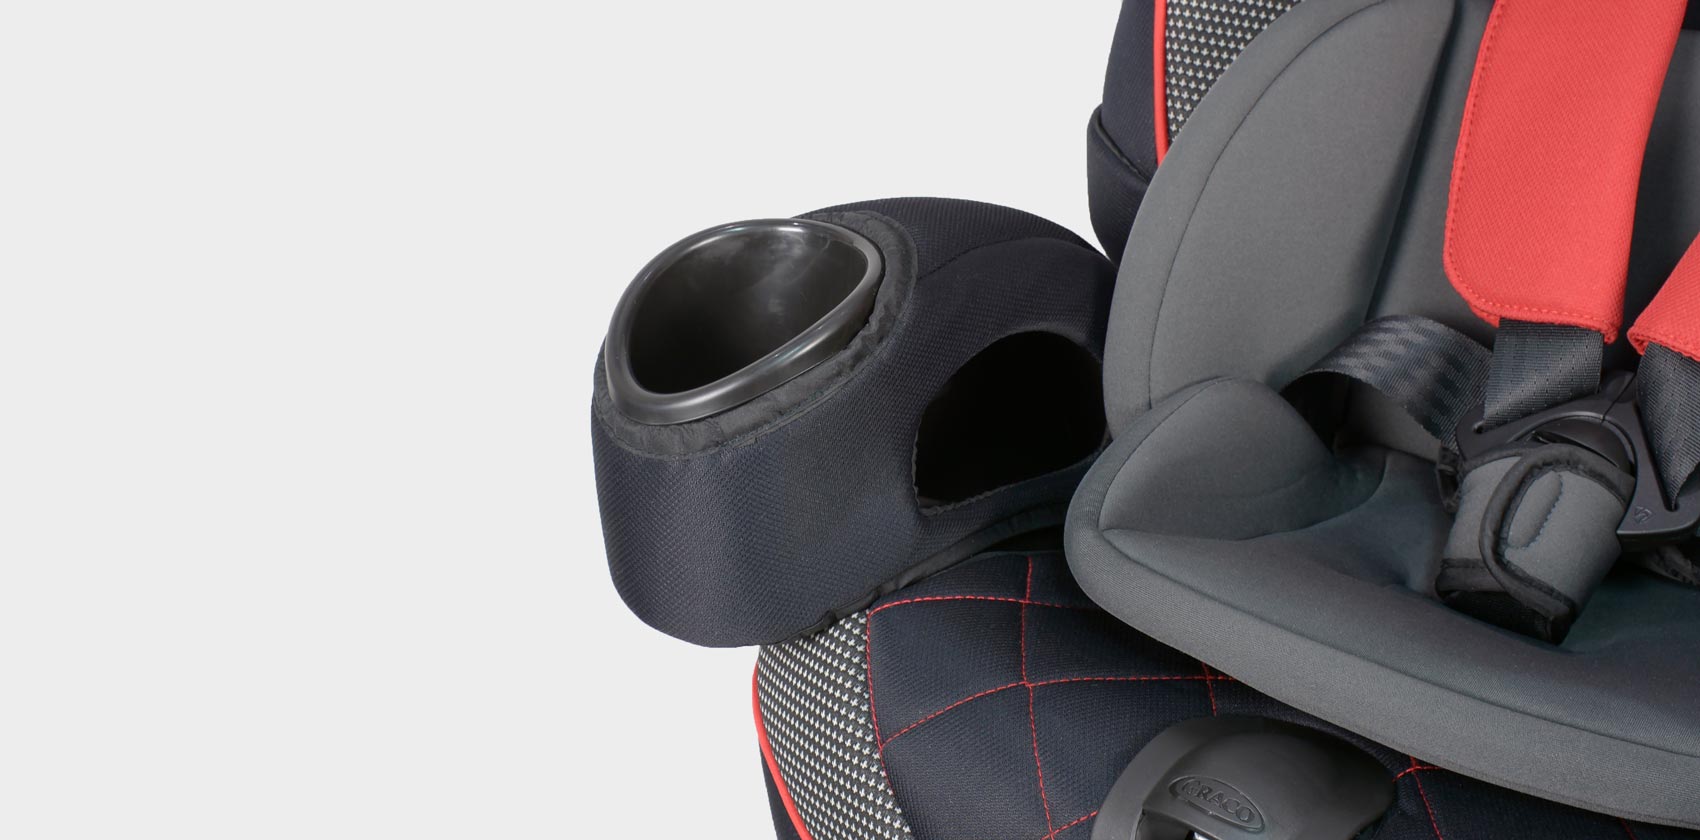
В комплекте к креслу идёт подстаканник, который встроен сбоку.
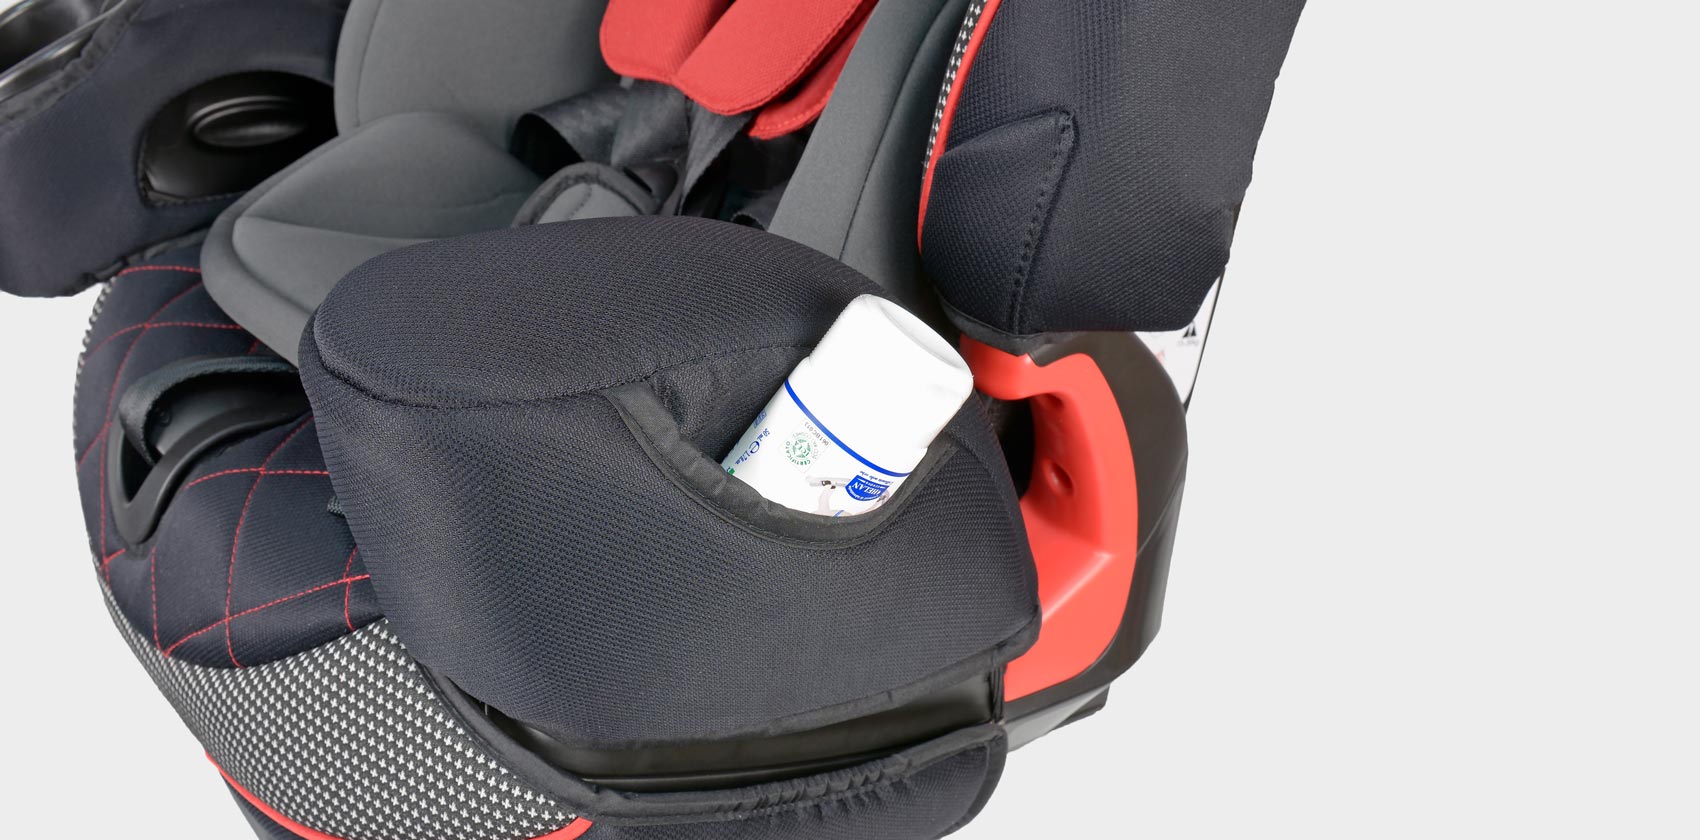
Предусмотрен кармашек для полезных вещей.
Для защиты салона автомобиля от вмятин и потёртостей рекомендуется использовать специальный коврик, например, Автодети Super Mat +.
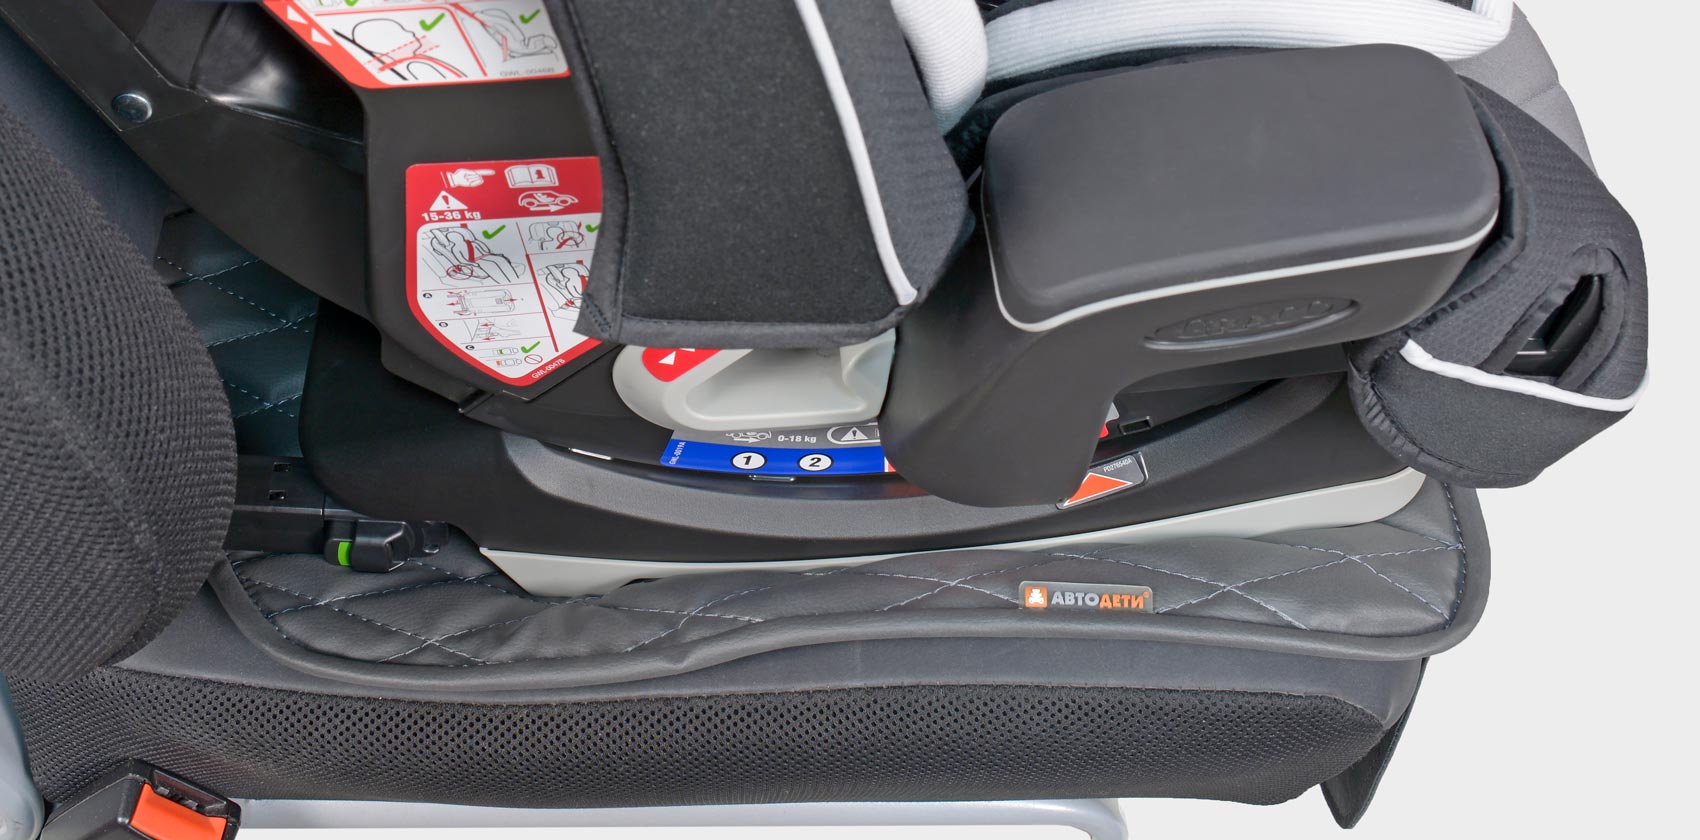
Коврик защитит также нижнюю часть автомобильного сиденья от контакта с обувью ребёнка.
Graco Nautilus 65 3-in-1 инструкция

Посмотреть инструкция для Graco Nautilus 65 3-in-1 бесплатно. Руководство относится к категории Автокресла, 8 человек(а) дали ему среднюю оценку 8.4. Руководство доступно на следующих языках: английский. У вас есть вопрос о Graco Nautilus 65 3-in-1 или вам нужна помощь? Задайте свой вопрос здесь
Нужна помощь?
У вас есть вопрос о Graco Nautilus 65 3-in-1 а ответа нет в руководстве? Задайте свой вопрос здесь Дай исчерпывающее описание проблемы и четко задайте свой вопрос. Чем детальнее описание проблемы или вопроса, тем легче будет другим пользователям Graco Nautilus 65 3-in-1 предоставить вам исчерпывающий ответ.
Количество вопросов: 0
Технические характеристики Graco Nautilus 65 3-in-1
Ниже вы найдете технические характеристики изделия и руководства по эксплуатации Graco Nautilus 65 3-in-1.
| Бренд | Graco |
| Модель | Nautilus 65 3-in-1 |
| Изделие | Автокресло |
| Язык | английский |
| Тип файла | Руководство пользователя (PDF) |
| Вес | 9185 g |
| Глубина | 457.2 mm |
| Ширина | 508 mm |
| Высота (макс) | 711.2 mm |
Часто задаваемые вопросы
Не можете найти ответ на свой вопрос в руководстве? Вы можете найти ответ на свой вопрос ниже, в разделе часто задаваемых вопросов о Graco Nautilus 65 3-in-1.
Нет, ребенок может задохнуться. Если ребенок заснул в Автокресло, его следует достать из Автокресло и поместить в кроватку. Как можно скорее возьмите заснувшего ребенка и положите в кроватку.
Самое безопасное место для автокресла находится в центре заднего сиденья, на достаточном расстоянии от подушек безопасности.
К сожалению, у нас нет руководства для Graco Nautilus 65 3-in-1, доступного в русский. Это руководство доступно в английский.
Похожие руководства по эксплуатации
Graco Nautilus 65 3-in-1 Harness
Graco Nautilus
Graco Atlas 65
Graco Nautilus 65 LX
Graco Nautilus 65
Graco Size4Me 65
Graco 4Ever
Graco Extend2Fit Convertible
Giordani Evolution 1/2/3 Isofix
Graco SnugRide 35 Lite
ManualsPDF . ru
Руководство по эксплуатации Graco Nautilus PD101777C
Наша цель - обеспечить Вам самый быстрый доступ к руководству по эксплуатации устройства Graco Nautilus PD101777C . Пользуясь просмотром онлайн Вы можете быстро просмотреть содержание и перейти на страницу, на которой найдете решение своей проблемы с Graco Nautilus PD101777C .
Для Вашего удобства
Если просмотр руководства Graco Nautilus PD101777C непосредственно на этой странице для Вас неудобен, Вы можете воспользоваться двумя возможными решениями:
- Полноэкранный просмотр -, Чтобы удобно просматривать инструкцию (без скачивания на компьютер) Вы можете использовать режим полноэкранного просмотра. Чтобы запустить просмотр инструкции Graco Nautilus PD101777C на полном экране, используйте кнопку Полный экран .
- Скачивание на компьютер - Вы можете также скачать инструкцию Graco Nautilus PD101777C на свой компьютер и сохранить ее в своем архиве. Если ты все же не хотите занимать место на своем устройстве, Вы всегда можете скачать ее из ManualsBase.
Печатная версия
Многие предпочитают читать документы не на экране, а в печатной версии. Опция распечатки инструкции также предусмотрена и Вы можете воспользоваться ею нажав на ссылку, находящуюся выше - Печатать инструкцию . Вам не обязательно печатать всю инструкцию Graco Nautilus PD101777C а только некоторые страницы. Берегите бумагу.
Резюме
Ниже Вы найдете заявки которые находятся на очередных страницах инструкции для Graco Nautilus PD101777C . Если Вы хотите быстро просмотреть содержимое страниц, которые находятся на очередных страницах инструкции, Вы воспользоваться ими.
Краткое содержание страницы № 1
Child Restraint/Booster Seat
Owner’s Manual
READ THIS MANUAL
Do not install or use this child restraint until you read and understand the instructions in this manual.
FAILURE TO PROPERLY USE THIS CHILD RESTRAINT INCREASES THE RISK OF SERIOUS
INJURY OR DEATH IN A SUDDEN STOP OR CRASH.
© 2007 Graco ISPC110BB 12/07 US�������������������������������������������������������������������������������������������������������������������������������������������������������������������������������
Краткое содержание страницы № 2
Table of Contents 1.0 Warnings to Parents and Other Users 7.3 SAFE Vehicle Seat Belt Systems . 19 . 4 7.4 For Built-in Harness Only . . .20 2.0 Registration Information. 5 2.1 Register Your Child Restraint 5 7.5 WITH or WITHOUT Built-in 2.2 Recall Information. 5 Harness . 21 2.3 If You Need Help . 5 7.6 To Install Locking Clip. 22 3.0 Features. 6-7 7.7 UNSAFE Vehicle Be
Краткое содержание страницы № 3
Краткое содержание страницы № 4
1.0 Warnings to Parents and Other Users Failure to properly use this child restraint increases the risk of serious injury or death in a sharp turn, sudden stop or crash. Your child’s safety depends on you installing and using this child restraint correctly. Even if using this child restraint seems easy to figure out on your own, it is very important to READ THE OWNER’S MANUAL and the vehicle owner’s manual. Your child’s safety depends on: 1. Choosing the correct mode of use for the child restr
Краткое содержание страницы № 5
Краткое содержание страницы № 6
3.0 Features Harness slots Height adjust button Shoulder belt guide Body support Head support Harness buckle Crotch strap Harness covers Harness clip Storage compartment (one on each side) Vehicle belt Recline guide foot Harness Cupholder Adjustment adjuster strap lever (above strap) Recline handle 6����������������������������������������������������������������������������������������������������������������������������������������������������������������������������������������������
Краткое содержание страницы № 7
The locking clip is stored on the back of the child restraint. You will need to use it with certain types of vehicle seat Harness slots belts. (behind straps) Strap United States Federal guides Tether Motor Vehicle Safety (behind straps) storage bar Standards have defined a new system for LATCH installing child restraints storage bars (on each side in vehicles. The system of seat) Red Rollers is called LATCH (Lower Release (behind straps) Anchorage and Tether buttons for CHildr
Краткое содержание страницы № 8
4.0 Assembling the Child Restraint Adult assembly required. KEEP GUTTERS CLEAR 1. Lay child restraint flat on back with armrests out to either side of base. Grab seat pad fabric in sitting area to expose the gutters . MAKE SURE all hands, fingers and other objects are clear of the gutters. 2. MAKE sure the harness straps are securely attached within the “T”-shaped slots around the arms as shown . KEEP GUTTERS CLEAR With your other hand, raise seat back so that both arms LOCK in
Краткое содержание страницы № 9
Краткое содержание страницы № 10
5. Attach 4 elastic loops from the seat pad under the seat exactly as shown in . 6. Pull elastic loop on the seat pad through the vehicle belt guide on side of seat and attach to hook as shown . Repeat on other side. 10 DO NOT use this car seat after December NE PAS utiliser ce siège d'auto après décembre NO use este asiento para autos después de Diciembre 2013�������������������������������������������������������������������������������������������������������������������������������
Краткое содержание страницы № 11
7. Squeeze height adjust button and push head support into slots on the back support as shown. Head support will click into the back support. You may need to unfasten the hook and loop attachment tape on both sides at the top of the back support to allow for easier access to the slots. Always use child restraint with head support installed and properly adjusted. CLICK! . 11���������������������������������������������������������������������������������������������������������������
Краткое содержание страницы № 12
Краткое содержание страницы № 13
5.0 Important Information • NO CHILD RESTRAINT CAN GUARANTEE • DO NOT use locking clip in booster mode. PROTECTION FROM INJURY. However, • NEVER PLACE THIS proper use of this child restraint reduces the CHILD RESTRAINT IN A risk of serious injury or death to your child. VEHICLE SEATING • DO NOT INSTALL OR USE THIS CHILD LOCATION THAT HAS A RESTRAINT UNTIL YOU READ AND FRONT AIR BAG. If an air bag UNDERSTAND THE INSTRUCTIONS IN THIS inflates, it can hit the child and child restraint MANU
Краткое содержание страницы № 14
• NEVER USE CHILD RESTRAINT IF IT HAS • NEVER LEAVE A CHILD RESTRAINT DAMAGED OR MISSING PARTS. Do not use UNSECURED IN YOUR VEHICLE. An a cut, frayed or damaged child restraint unsecured child restraint can be thrown around harness, LATCH belt or vehicle seat belt. and may injure occupants in a sharp turn, • THE CHILD RESTRAINT CAN BECOME sudden stop or crash. Remove it or make sure VERY HOT IF LEFT IN THE SUN. Contact with that it is securely belted in the vehicle. If not these
Краткое содержание страницы № 15
6.0 Height and Weight Limitations FAILURE TO USE CHILD RESTRAINT IN A MANNER APPROPRIATE FOR YOUR CHILD’S SIZE MAY INCREASE THE RISK OF SERIOUS INJURY OR DEATH. Instructions for the use of this child restraint differ greatly depending on the size of your child. Be sure you are using the child restraint in the correct mode and with the correct features for your child. 6.1 WITH Built-In Harness Your child must meet all requirements: • Weight: 20 to 65 lbs (mass between 9 and 29.5 kg) • Heigh
Краткое содержание страницы № 16
6.2 WITHOUT Built-in Harness Your child must meet all requirements: • Weight: 30 to 100 lbs (mass between 13.6 and 45 kg) • Height: 38 to 57 inches (96 and 145 cm) in height • approximately 3-10 years of age • the shoulder belt MUST lie across child’s shoulder as shown and the lap portion of the belt is positionned low on the child’s hips. • Child’s ears are BELOW top of booster seat. If tops of ears are above top of seat, child is too large for booster seat. If child is between 30 and 6
Краткое содержание страницы № 17
6.3 WITHOUT Back Support Your child must meet all requirements: • weigh between 40 and 100 lbs. (mass between 18 and 45 kg), • and are between 40 and 57 inches (101 and 145 cm) in height, • approximately 4-10 years of age • the shoulder belt MUST lie across child’s shoulder as shown and the lap portion of the belt is positionned low on the child’s hips. When sitting on the booster seat, your child’s ears should be below the top of the vehicle seat cushion / head rest. Your Graco
Краткое содержание страницы № 18
7.0 Choosing an Appropriate Vehicle Seat Location 7.1 Vehicle Seat Location Requirements IMPROPER PLACEMENT OF THE CHILD RESTRAINT INCREASES THE RISK OF SERIOUS INJURY OR DEATH. Some seating positions in your vehicle may not be safe for this child restraint. Some vehicles do not have any seating positions that can be used safely with the child restraint. If you are not sure where to place the child restraint in your vehicle, consult your vehicle owner’s manual or call Graco Children’s Produ
Краткое содержание страницы № 19
7.2 Vehicle Seat Belt Requirements MANY SEAT BELT SYSTEMS ARE NOT SAFE TO USE WITH THE CHILD RESTRAINT. THE VEHICLE SEAT BELT MUST BE DESIGNED TO HOLD THE CHILD RESTRAINT TIGHTLY AT ALL TIMES. Pay careful attention to these systems; some of the seat belts that are not safe to use look very much like seat belts that are safe to use. If you are unsure, consult your vehicle owner’s manual or call Graco Children’s Products Inc., 1-800-345-4109. 7.3 SAFE Vehicle Seat Belt Systems THE FO
Краткое содержание страницы № 20
7.4 For Built-in Harness Only • Lap Belts - Manually Adjusted When buckled, the belt is tightened manually by pulling on the excess belt. • Lap Belts with Automatic Locking Retractor (ALR) The automatic locking retractor will not permit the lap belt to lengthen once it is buckled. Tighten the belt by feeding the belt back into the retractor while pushing down hard on the child restraint. 20��������������������������������������������������������������������������������������������������
Руководство по эксплуатации Graco Nautilus 1753283
Наша цель - обеспечить Вам самый быстрый доступ к руководству по эксплуатации устройства Graco Nautilus 1753283 . Пользуясь просмотром онлайн Вы можете быстро просмотреть содержание и перейти на страницу, на которой найдете решение своей проблемы с Graco Nautilus 1753283 .
Для Вашего удобства
Если просмотр руководства Graco Nautilus 1753283 непосредственно на этой странице для Вас неудобен, Вы можете воспользоваться двумя возможными решениями:
- Полноэкранный просмотр -, Чтобы удобно просматривать инструкцию (без скачивания на компьютер) Вы можете использовать режим полноэкранного просмотра. Чтобы запустить просмотр инструкции Graco Nautilus 1753283 на полном экране, используйте кнопку Полный экран .
- Скачивание на компьютер - Вы можете также скачать инструкцию Graco Nautilus 1753283 на свой компьютер и сохранить ее в своем архиве. Если ты все же не хотите занимать место на своем устройстве, Вы всегда можете скачать ее из ManualsBase.
Печатная версия
Многие предпочитают читать документы не на экране, а в печатной версии. Опция распечатки инструкции также предусмотрена и Вы можете воспользоваться ею нажав на ссылку, находящуюся выше - Печатать инструкцию . Вам не обязательно печатать всю инструкцию Graco Nautilus 1753283 а только некоторые страницы. Берегите бумагу.
Резюме
Ниже Вы найдете заявки которые находятся на очередных страницах инструкции для Graco Nautilus 1753283 . Если Вы хотите быстро просмотреть содержимое страниц, которые находятся на очередных страницах инструкции, Вы воспользоваться ими.
Краткое содержание страницы № 1
Child Restraint/Booster Seat
Owner’s Manual
READ THIS MANUAL
Do not install or use this child restraint until you read and understand the instructions in this manual.
FAILURE TO PROPERLY USE THIS CHILD RESTRAINT INCREASES THE RISK OF SERIOUS
INJURY OR DEATH IN A SUDDEN STOP OR CRASH.
© 2007 Graco ISPC110BB 12/07 US�������������������������������������������������������������������������������������������������������������������������������������������������������������������������������
Краткое содержание страницы № 2
Table of Contents 1.0 Warnings to Parents and Other Users 7.3 SAFE Vehicle Seat Belt Systems . 19 . 4 7.4 For Built-in Harness Only . . .20 2.0 Registration Information. 5 2.1 Register Your Child Restraint 5 7.5 WITH or WITHOUT Built-in 2.2 Recall Information. 5 Harness . 21 2.3 If You Need Help . 5 7.6 To Install Locking Clip. 22 3.0 Features. 6-7 7.7 UNSAFE Vehicle Be
Краткое содержание страницы № 3
Краткое содержание страницы № 4
1.0 Warnings to Parents and Other Users Failure to properly use this child restraint increases the risk of serious injury or death in a sharp turn, sudden stop or crash. Your child’s safety depends on you installing and using this child restraint correctly. Even if using this child restraint seems easy to figure out on your own, it is very important to READ THE OWNER’S MANUAL and the vehicle owner’s manual. Your child’s safety depends on: 1. Choosing the correct mode of use for the child restr
Краткое содержание страницы № 5
Краткое содержание страницы № 6
3.0 Features Harness slots Height adjust button Shoulder belt guide Body support Head support Harness buckle Crotch strap Harness covers Harness clip Storage compartment (one on each side) Vehicle belt Recline guide foot Harness Cupholder Adjustment adjuster strap lever (above strap) Recline handle 6����������������������������������������������������������������������������������������������������������������������������������������������������������������������������������������������
Краткое содержание страницы № 7
The locking clip is stored on the back of the child restraint. You will need to use it with certain types of vehicle seat Harness slots belts. (behind straps) Strap United States Federal guides Tether Motor Vehicle Safety (behind straps) storage bar Standards have defined a new system for LATCH installing child restraints storage bars (on each side in vehicles. The system of seat) Red Rollers is called LATCH (Lower Release (behind straps) Anchorage and Tether buttons for CHildr
Краткое содержание страницы № 8
4.0 Assembling the Child Restraint Adult assembly required. KEEP GUTTERS CLEAR 1. Lay child restraint flat on back with armrests out to either side of base. Grab seat pad fabric in sitting area to expose the gutters . MAKE SURE all hands, fingers and other objects are clear of the gutters. 2. MAKE sure the harness straps are securely attached within the “T”-shaped slots around the arms as shown . KEEP GUTTERS CLEAR With your other hand, raise seat back so that both arms LOCK in
Краткое содержание страницы № 9
Краткое содержание страницы № 10
5. Attach 4 elastic loops from the seat pad under the seat exactly as shown in . 6. Pull elastic loop on the seat pad through the vehicle belt guide on side of seat and attach to hook as shown . Repeat on other side. 10 DO NOT use this car seat after December NE PAS utiliser ce siège d'auto après décembre NO use este asiento para autos después de Diciembre 2013�������������������������������������������������������������������������������������������������������������������������������
Краткое содержание страницы № 11
7. Squeeze height adjust button and push head support into slots on the back support as shown. Head support will click into the back support. You may need to unfasten the hook and loop attachment tape on both sides at the top of the back support to allow for easier access to the slots. Always use child restraint with head support installed and properly adjusted. CLICK! . 11���������������������������������������������������������������������������������������������������������������
Краткое содержание страницы № 12
Краткое содержание страницы № 13
5.0 Important Information • NO CHILD RESTRAINT CAN GUARANTEE • DO NOT use locking clip in booster mode. PROTECTION FROM INJURY. However, • NEVER PLACE THIS proper use of this child restraint reduces the CHILD RESTRAINT IN A risk of serious injury or death to your child. VEHICLE SEATING • DO NOT INSTALL OR USE THIS CHILD LOCATION THAT HAS A RESTRAINT UNTIL YOU READ AND FRONT AIR BAG. If an air bag UNDERSTAND THE INSTRUCTIONS IN THIS inflates, it can hit the child and child restraint MANU
Краткое содержание страницы № 14
• NEVER USE CHILD RESTRAINT IF IT HAS • NEVER LEAVE A CHILD RESTRAINT DAMAGED OR MISSING PARTS. Do not use UNSECURED IN YOUR VEHICLE. An a cut, frayed or damaged child restraint unsecured child restraint can be thrown around harness, LATCH belt or vehicle seat belt. and may injure occupants in a sharp turn, • THE CHILD RESTRAINT CAN BECOME sudden stop or crash. Remove it or make sure VERY HOT IF LEFT IN THE SUN. Contact with that it is securely belted in the vehicle. If not these
Краткое содержание страницы № 15
6.0 Height and Weight Limitations FAILURE TO USE CHILD RESTRAINT IN A MANNER APPROPRIATE FOR YOUR CHILD’S SIZE MAY INCREASE THE RISK OF SERIOUS INJURY OR DEATH. Instructions for the use of this child restraint differ greatly depending on the size of your child. Be sure you are using the child restraint in the correct mode and with the correct features for your child. 6.1 WITH Built-In Harness Your child must meet all requirements: • Weight: 20 to 65 lbs (mass between 9 and 29.5 kg) • Heigh
Краткое содержание страницы № 16
6.2 WITHOUT Built-in Harness Your child must meet all requirements: • Weight: 30 to 100 lbs (mass between 13.6 and 45 kg) • Height: 38 to 57 inches (96 and 145 cm) in height • approximately 3-10 years of age • the shoulder belt MUST lie across child’s shoulder as shown and the lap portion of the belt is positionned low on the child’s hips. • Child’s ears are BELOW top of booster seat. If tops of ears are above top of seat, child is too large for booster seat. If child is between 30 and 6
Краткое содержание страницы № 17
6.3 WITHOUT Back Support Your child must meet all requirements: • weigh between 40 and 100 lbs. (mass between 18 and 45 kg), • and are between 40 and 57 inches (101 and 145 cm) in height, • approximately 4-10 years of age • the shoulder belt MUST lie across child’s shoulder as shown and the lap portion of the belt is positionned low on the child’s hips. When sitting on the booster seat, your child’s ears should be below the top of the vehicle seat cushion / head rest. Your Graco
Краткое содержание страницы № 18
7.0 Choosing an Appropriate Vehicle Seat Location 7.1 Vehicle Seat Location Requirements IMPROPER PLACEMENT OF THE CHILD RESTRAINT INCREASES THE RISK OF SERIOUS INJURY OR DEATH. Some seating positions in your vehicle may not be safe for this child restraint. Some vehicles do not have any seating positions that can be used safely with the child restraint. If you are not sure where to place the child restraint in your vehicle, consult your vehicle owner’s manual or call Graco Children’s Produ
Краткое содержание страницы № 19
7.2 Vehicle Seat Belt Requirements MANY SEAT BELT SYSTEMS ARE NOT SAFE TO USE WITH THE CHILD RESTRAINT. THE VEHICLE SEAT BELT MUST BE DESIGNED TO HOLD THE CHILD RESTRAINT TIGHTLY AT ALL TIMES. Pay careful attention to these systems; some of the seat belts that are not safe to use look very much like seat belts that are safe to use. If you are unsure, consult your vehicle owner’s manual or call Graco Children’s Products Inc., 1-800-345-4109. 7.3 SAFE Vehicle Seat Belt Systems THE FO
Краткое содержание страницы № 20
7.4 For Built-in Harness Only • Lap Belts - Manually Adjusted When buckled, the belt is tightened manually by pulling on the excess belt. • Lap Belts with Automatic Locking Retractor (ALR) The automatic locking retractor will not permit the lap belt to lengthen once it is buckled. Tighten the belt by feeding the belt back into the retractor while pushing down hard on the child restraint. 20��������������������������������������������������������������������������������������������������
Читайте также:
